Posted on

Apple and Beetroot Bhelpuri

Apple-Beetroot-Bhelpuri-Recipe-Spoonfulstories

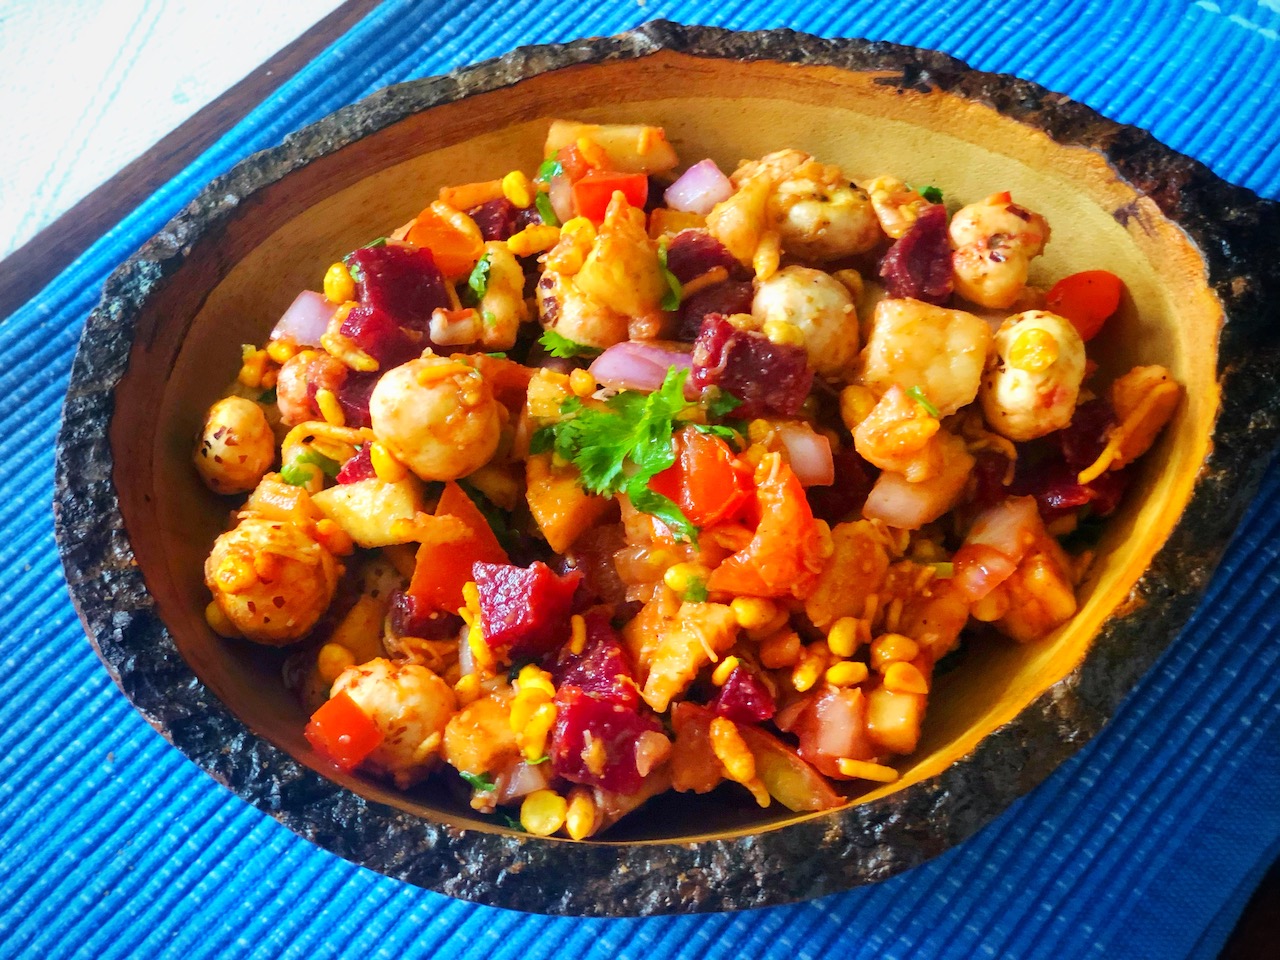
Bhelpuri is a popular Indian savory snack that is very popular in the streets of Mumbai. Made with puffed rice, tossed with vegetables and garnished with tangy sauces and spices. I’m sure this Apple Beetroot Bhelpuri healthy snack will leave your mouth watering for more. 

My dad is truly a Bhelpuri lover! He has a bowl of Bhelpuri everyday as his evening snack, that is why I was so eager to give this dish a healthy yet tasty twist. I knew with the amount of Bhelpuri my dad was consuming it was important to make it into a healthy snack. And you won’t believe it, he truly enjoyed this healthy version of Apple Beetroot Bhelpuri! 

Bhelpuri is a tasty and chatpata snack. Bhelpuri is known for its taste and flavour. The imli chutney (tamarind sauce) and the green chutney (mint and coriander sauce) is what makes the Bhelpuri unique and delicious! 

The imli and green chutney not only enhance the flavour of this healthy side dish but also give it a better texture. The chutneys make the Bhelpuri semi dry as compared to its dry texture. But due to its semi dry texture the dish has to be served immediately as it can easily become soggy. That is why Bhelpuri is always prepared freshly by the street vendors rather than being made in advance and stored. 

Chutneys added in Bhelpuri

  • Green Chutney (Mint and Coriander Sauce)
  • Imli Chutney (Tamarind Sauce)

Commonly used ingredients for Apple Beetroot Bhelpuri

  • The vegetables used to make Bhelpuri may vary from region to region. But the vegetables commonly used are onions, tomatoes and potatoes. But for this particular recipe I have used diced apple and boiled beetroot. You could also add sprouts and diced cucumber. 
  • Another ingredient that is commonly used is Sev. Sev are thin crunchy noodles made out of chickpea flour. Sev is used for garnishing and is even mixed into the Bhelpuri mixture. I have used roasted peanuts and fox nuts for adding crunch to the dish.
  • The dish has a variety of spices in it. Such as chaat masala, salt, pepper, black salt, red chilli powder. Lemon juice is also added to the dish to give it a slightly tangy taste.
  • Herbs such as coriander and mint leaves are used to garnish this healthy snack and are even mixed into the Bhelpuri mixture.
  • Green chutney and imli chutney are the two main sauces used for this recipe. People also like to add a red spicy sauce if you like to have your food spicy.  

Serve the Bhelpuri immediately after tossing it all together as the mixture can get soggy. If you would like to prepare it ahead then mix all the dry ingredients together and the wet ingredients separately. Combine the two together right before serving so the Bhelpuri remains crunchy. 

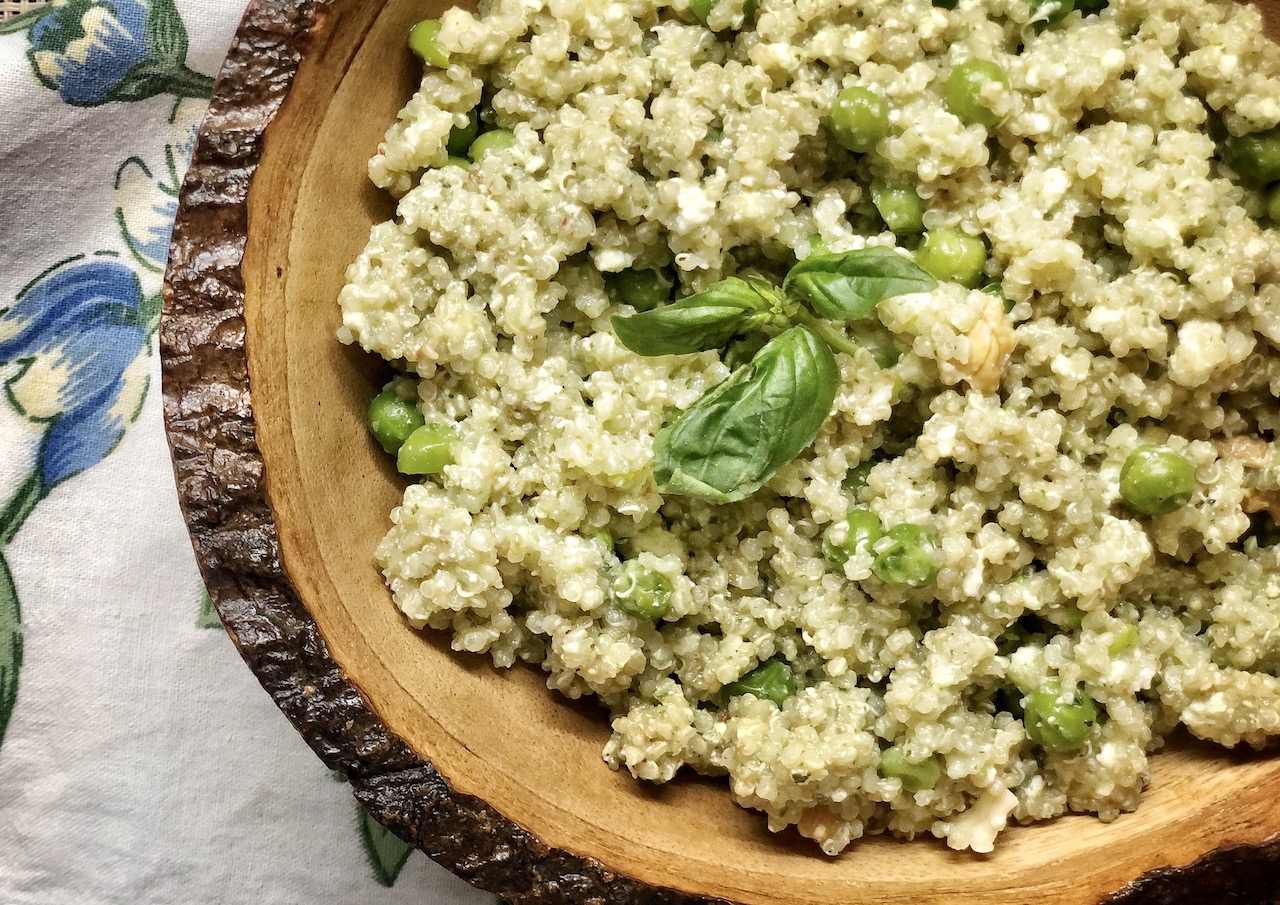
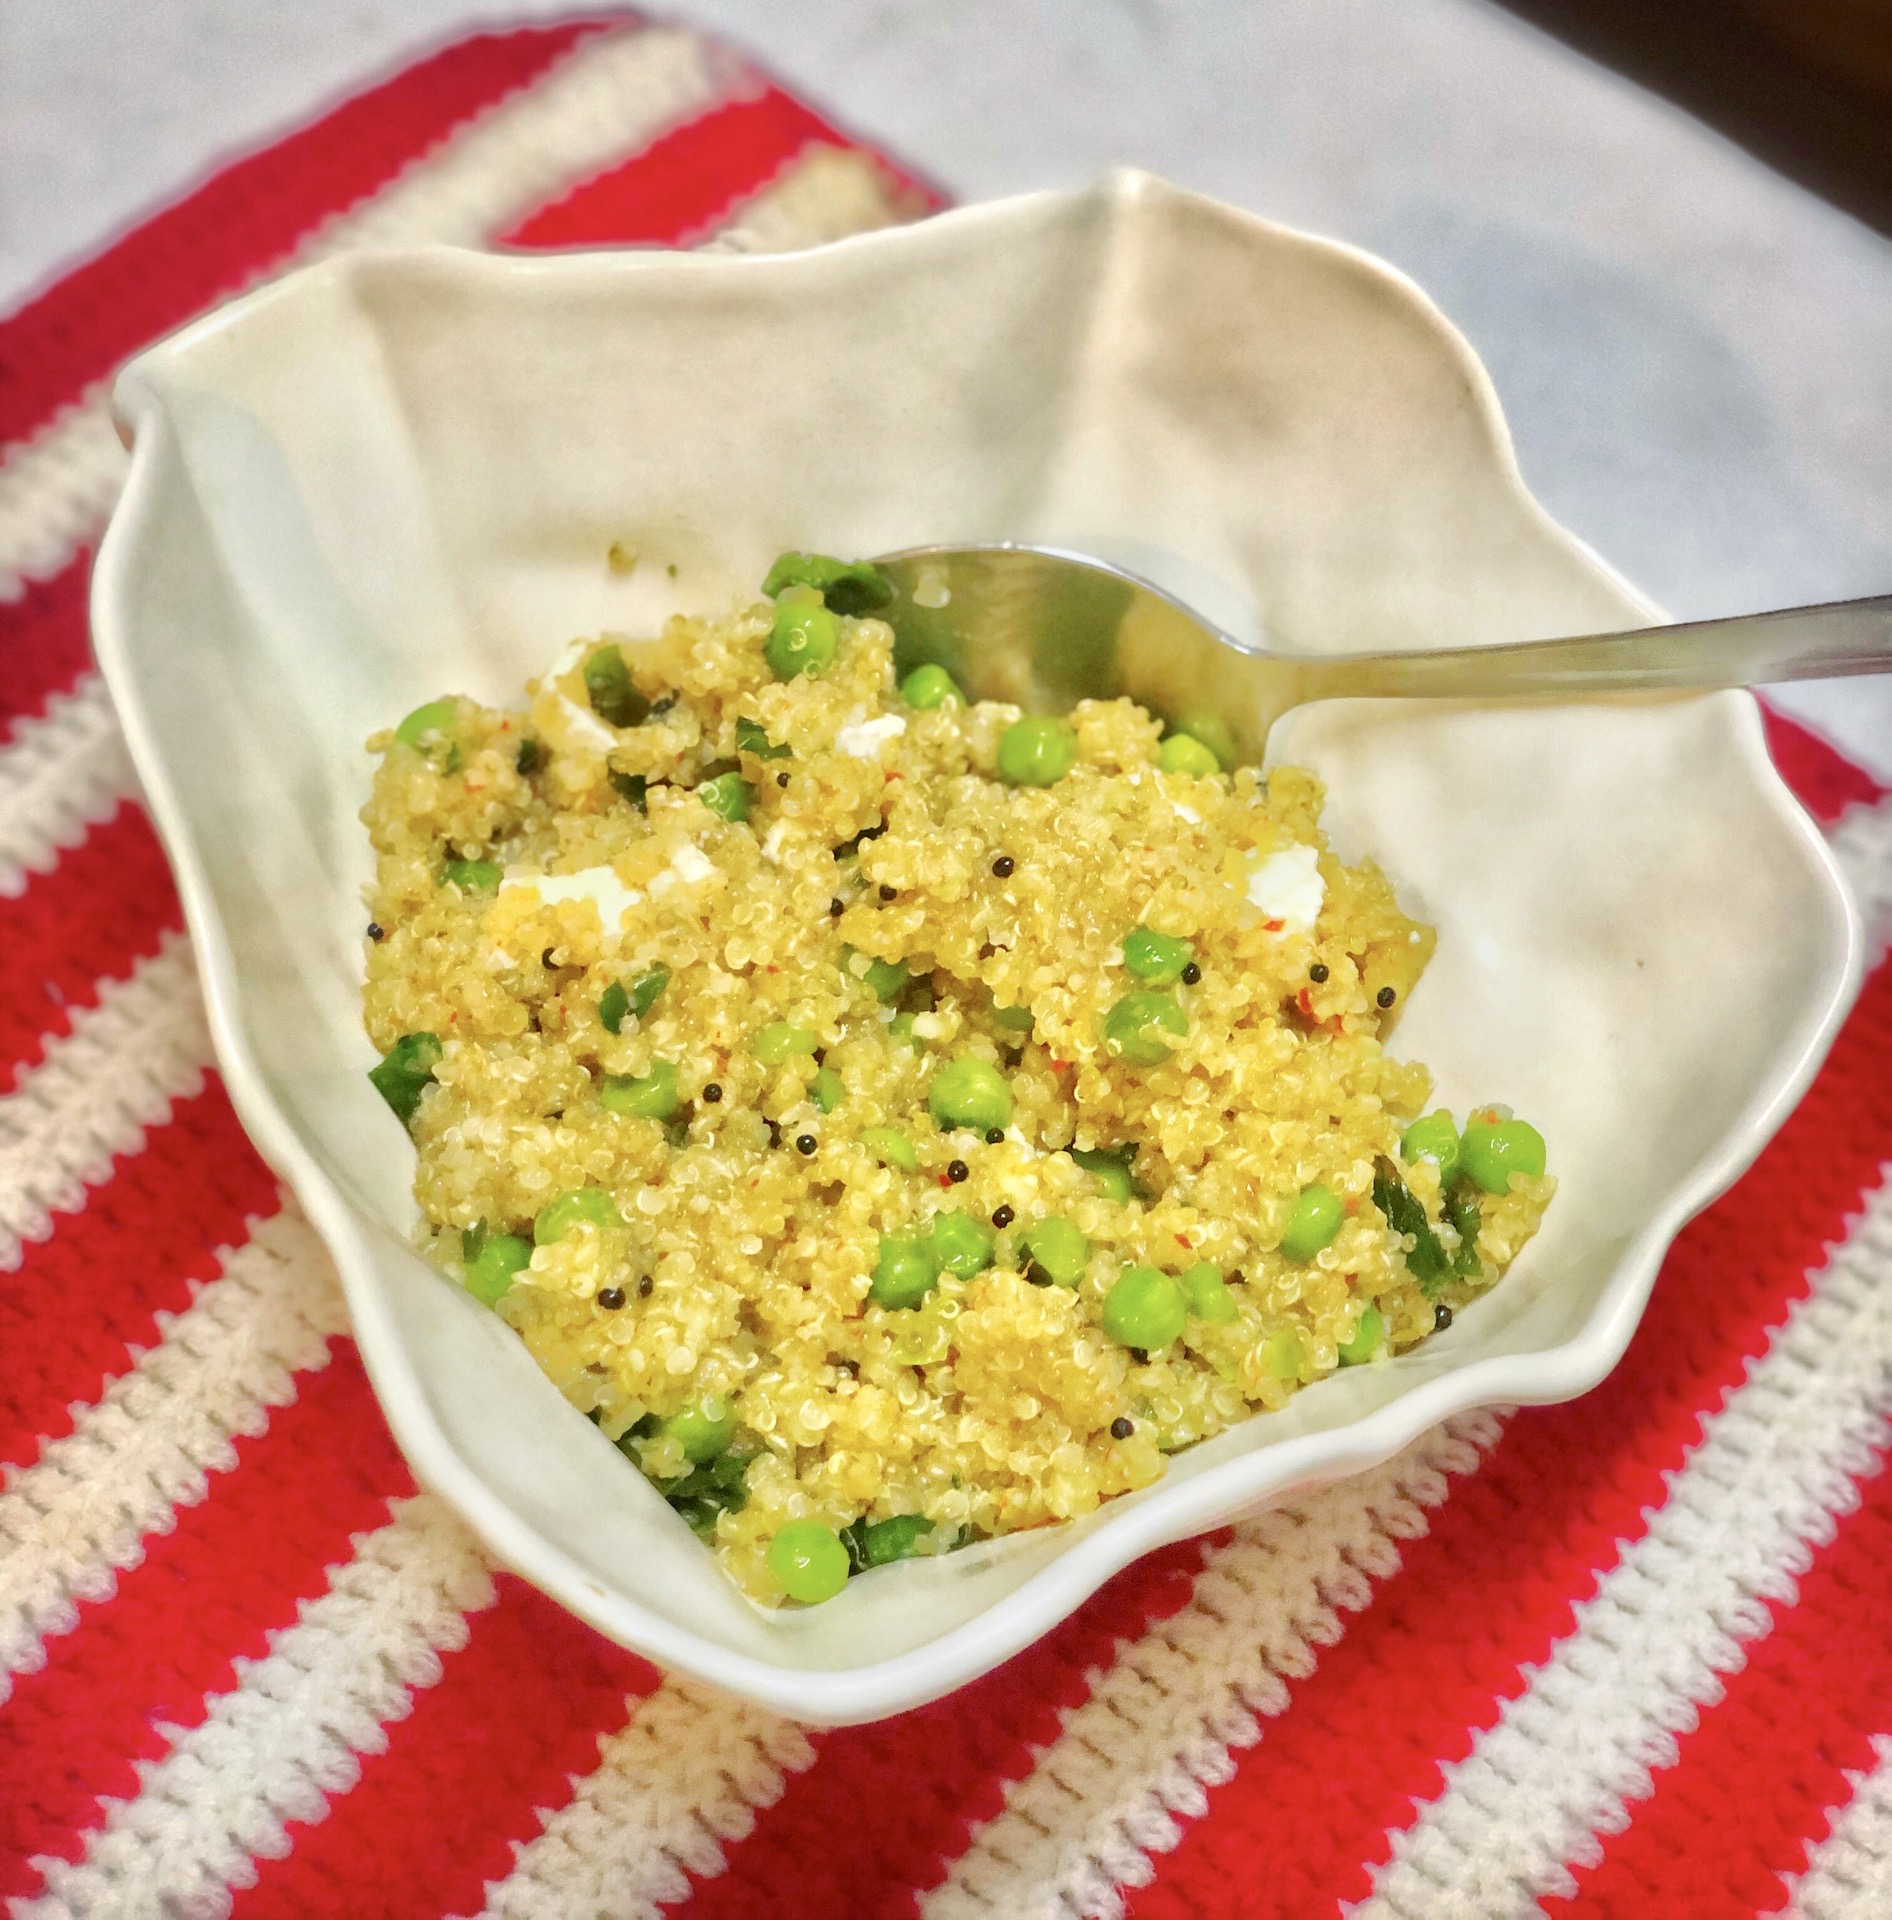
You can also try the Green Pea and Peanut Quinoa if you want to have a healthy snack! 

Apple and Beetroot Bhelpuri

Recipe by Ishana PassiCourse: Side Dish, VegetarianDifficulty: Easy
Servings

4

servings
Prep time

10

minutes
Cooking time

10

minutes
Total time

20

minutes

Ingredients

  • 1 cup puffed rice

  • 1 cup fox nuts (lotus seeds)

  • 1/2 cup chopped boiled beets

  • 1//2 cup chopped fresh apple

  • 1 small onion diced

  • 1 large tomato diced

  • 1 spoon mint leaves chopped

  • 1 spoon coriander leaves chopped

  • 2-3 green chillies chopped

  • 2 tsp green coriander and mint chutney

  • 2-3 tsp tamarind chutney

  • 1/2 tsp chaat masala

  • 1/2 tsp amchoor powder

  • salt to taste

  • 1/2 tsp black salt

  • 2 tsp lemon juice

Directions

  • In a large bowl, mix all the dry ingredients and vegetables. Toss it well together.
  • Add all the spices and chutneys and mix well.
  • Transfer it into a serving dish and garnish with coriander and mint leaves or seviyan.
  • Serve immediately otherwise it will start to get soggy.

Notes

  • You can add other vegetables too. See the commonly used ingredients above.
Posted on

Beetroot Hummus – Best Hummus Recipe

How-to-make-beetroot-hummus-spoonful-stories

Hot pink, lemony with a kick of garlic, loaded with vitamins and minerals, super creamy and flavourful, and perfect with pita or veggies as a spread! This Vegan Beetroot Hummus is the best hummus recipe and makes for the perfect evening snack! 

It’s easy to make, beautiful to look at and full of nutritional value! 

Once you’re beets and chickpeas are cooked, it’s simply a matter of throwing everything into the blender or food processor and whisking it away. It’s the perfect make ahead hummus recipe, you can store it in the fridge for up to a week. 

I was slightly afraid before taking my first bite as i thought the beets would overpower the taste of the hummus or altogether it might not taste great. But it was amazingly delicious! The lemon, garlic and tahini helped to balance the taste of the beets and gave it a creamy texture making it the best hummus recipe!

It wasn’t just me who liked it, even my father was all for it which is a major factor for me! Honestly, my dad’s feedback is the most important for me when I cook. We had the Beetroot Hummus with chips and veggies. 

Ingredients for Hummus

Ingredients-beetroot-hummus-spoonful-stories

All that you need for this easy hummus recipe is cooked and peeled chickpeas, boiled / baked and peeled beetroots, tahini, garlic cloves, lemon juice, olive oil and cumin powder. I’m sure most of you have these ingredients stocked up in your pantry. With such few and easily available ingredients this recipe makes for a great dip if you have guests coming in 

It’s pretty to look at and amazingly delicious. It will make your tabletop vibrant and will leave you wanting for more. Serve with pita, chips or veggies and make it a party snack or a side dish that your guests will truly love.

You will truly love this Beetroot Hummus because its:

recipe-beetroot-hummus-spoonful-stories
  • Vegan
  • Gluten free
  • Low fat
  • Nutritious 
  • Silky
  • Rich
  • Super delicious 
  • Beautiful to look at

The secret to a smooth and creamy hummus

  • Ice cold water – I don’t have scientific reason behind this, but every time I have mixed tahini with ice cold water it gives the hummus a smooth, creamy and velvety texture. It also seems to make my hummus light and fluffy. The water turns the hummus into a smooth and fluffy dip!
  • Peel the chickpeas – Another trick for the smoothest hummus is to peel the chickpeas and remove the skin of each grain. I know it’s time consuming and requires patience but it’s all worth it! Skinless chickpeas will definitely give a creamy and smooth texture to the hummus.
  • Soak the garlic in lemon juice – If using raw garlic, smash it up and soak it in lemon juice for a few minutes. The acidity of the lemon juice will remove the heat and bitterness of the garlic, leaving behind nothing but sweet garlicky flavour. 
  • Tahini – The best hummus needs to have a decent amount of good quality tahini. Not just a tablespoon or two but a good amount. Using good quality tahini rather than a cheap supermarket one will make a huge difference to the way your hummus will taste. 

Pair this hummus with the Lemon Herb Grilled Chicken Salad to make it a complete healthy meal!

Beetroot Hummus – Best Hummus Recipe

Recipe by Ishana PassiCourse: Side Dish, VeganDifficulty: Easy
Servings

6

servings
Prep time

30

minutes
Cooking time

40

minutes
Total time

1

hour 

10

minutes

Ingredients

  • 3 cups cooked and peeled chickpeas

  • 300 gm beetroot

  • 4 tbsp lemon juice

  • 1 tsp cumin powder

  • 1/4 tsp salt

  • 1/4 cup tahini

  • 1 tbsp olive oil

  • 3/4 cup ice cold water

  • fresh parsley for garnishing

  • 3 cloves minced garlic

Directions

  • Boil the beetroot until fully cooked. Once cool, peel of the skin and chop into large chunks. Soak the minced garlic in the lemon juice and set aside.
  • Pour tahini and ice cold water to the bottom of the blender and then the rest of ingredients. Blend well until smooth.
  • If the hummus is too thick drizzle more water or olive oil.
  • Garnish with parsley leaves or sesame seeds. Serve with pita, veggies or chips.
Posted on

Mango Bell Pepper Summer Slaw

Mango-Bell-Pepper-Summer-Slaw-Recipe-Spoonful-Stories

Mango Bell Pepper Summer Slaw is a cool and crisp side dish perfect to beat the summer heat! It is healthy, detoxing and low fat. You’ll find yourself eating it all by yourself, because it’s that good! 

I have recently been focusing more on recipes using mangoes because it’s raining mangoes in my house! We have a mango tree in our backyard and every year it gives so many mangoes, that are sweet and juicy! So I am trying my best to make the most of them this mango season. 

Tip – If you are in a situation like me and don’t know what to do with so many mangoes, I have a tip for you to make them last all season! Simply chop them, put them in ziplock pouches and freeze them for upto 6 months! 

I simply love healthy clean tropical textures and flavours. This summer slaw is one of them which makes a perfect healthy side dish or salad, adding brightness and lightness to meals! It can also be made ahead, and kept for days! Simple to toss, clean and detoxifying, this healthy salad is one to add to your summer menus.

Ingredients-Mango-Bell-Pepper-Slaw

Simply look at these fresh ingredients! 

How to make this Mango Bell Pepper Summer Slaw your own

There are a few ways you can adapt this easy summer salad and make it perfect for your taste buds. Here are some idea – 

  • If you prefer your salads spicy, add in some diced jalapeños or bird eye chilli. If you like it really spicy, leave in the seeds of the pepper. But, if you like a little heat but not as much, then simply use the flesh of the peppers and leave the seeds out. 
  • If you don’t have fresh lemon juice available, use apple cider vinegar or distilled vinegar. But I always prefer using freshly squeezed lemon juice as it adds more flavour to the salad. But the vinegar will give the slaw the acidity it needs. 
  • If you are not a cilantro lover, no issues! You and I will get along very well! You can leave them out, it won’t make much of a difference. Add mint leaves instead. 
  • If you want to get slightly more creative, add in some diced avocados, pineapples or chopped tomatoes. If you are using avocados I suggest you add it immediately prior to before serving the slaw to prevent any browning. 

If you enjoy having summer salad, don’t forget to try the Watermelon and Cottage Cheese Salad, Lemon Herb Grilled Chicken Salad and the Green Mango Salad.

Mango Bell Pepper Summer Slaw

Recipe by Ishana PassiCourse: Salads, Side DishDifficulty: Easy
Servings

4

servings
Prep time

15

minutes
Cooking time

10

minutes
Total time

25

minutes

It is healthy, detoxing and low fat. You’ll find yourself eating it all by yourself, because it’s that good! 

Ingredients

  • 1 red bell pepper, peeled and thinly sliced

  • 2 ripe mangoes, thinly sliced

  • 1 large cucumber, thinly sliced

  • 1 tbsp fresh cilantro, roughly chopped

  • 1 tbsp fresh mint, roughly chopped

  • 1/4 cup toasted peanuts, crushed

  • Salad Dressing
  • 1/4 cup lime juice

  • 2 tsp castor sugar

  • 2 tsp fish sauce

  • 1 spoon sesame oil

  • 1 tsp red chilli flakes

Directions

  • In a small bowl mix all the ingredients together for the dressing and keep aside.
  • In a separate bowl, toss the remaining ingredients together except the peanuts.
  • Toss the salad and the dressing together and garnish with roasted peanuts.
Posted on

Green Pea Quinoa Salad with Basil Vinaigrette

Green-pea-quino-salad-with-basil-vinaigrette

Quinoa Salad with spring green peas, cottage cheese, walnuts and an easy basil vinaigrette is the perfect recipe for a healthy meal. It’s also a great healthy side dish for grilled chicken or fish or meat. 

My dad loves having delicious and wholesome dishes like this Green Pea Quinoa with Basil Vinaigrette. I normally make it and store it for a few days in the fridge. Everyone likes to eat healthy and tasty food but doesn’t have time to prepare for it and cook it from scratch. Meal prepping and pre planning meals is a good way to eat homemade delicious healthy food. This healthy salad recipe is one of the recipes that you can make ahead and store for a few days in the fridge. 

This salad is a regular side dish or a full meal itself in my house. It is healthy, delicious and wholesome! The basil vinaigrette makes this quinoa salad a refreshing summer salad. It can be eaten warm or cold, as you like it. It is a perfect healthy family meal to serve along with a piece of grilled meat. 

The combination of green peas and cottage cheese is a match made in heaven! This combination is great for the grains in this salad. Being North Indian, my fridge is always stocked with cottage cheese. But if you want to be fancy, serve it with feta instead of cottage cheese. 

What else can I add to my Green Pea Quinoa Salad with Basil Vinaigrette? 

There are many variations to this salad. There are many ingredients that you can add according to the taste you prefer. Simply add your favourite vegetables or sliced grilled chicken. A few options are:

  1. Drained and Rinsed Chickpeas
  2. Sliced Grilled Chicken
  3. Dried Cranberries/Apricots
  4. Chopped Cauliflower
  5. Chopped Broccoli 

Basil Vinaigrette 

My recipe for the Basil Vinaigrette is the easiest and tastiest salad dressing. It works great as a salad dressing but also as a sauce for chicken, fish or even pasta. It is amazing on just about everything! 

During the summer when my dad is craving refreshing and wholesome salads, I’m always looking to try out new salad dressings. But this Basil Vinaigrette is my favourite. 

It is easy, refreshing and requires minimum prep and ingredients. 

Use a blender or a food processor and you’re good to go! Simply blend together, basil, coriander, vinegar, honey, onions, garlic, olive oil, salt and pepper and red pepper flakes. The end result is a bright green vinaigrette that is bursting with flavour. 

Store it in a jar and keep it in your fridge for up to 5 days! I highly recommend you to have it with grilled chicken. Use my recipe for the grilled chicken marinade from the Lemon Herb Grilled Chicken Salad. It is life changing! 

I can guarantee this healthy salad dressing recipe will be a staple in your house too! 

Green Pea Quinoa Salad with Basil Vinaigrette

Recipe by Ishana PassiCourse: Salads, Side DishDifficulty: Easy
Servings

6

servings
Prep time

5

minutes
Cooking time

15

minutes
Total time

20

minutes

Quinoa Salad with spring green peas, cottage cheese, walnuts and an easy basil vinaigrette is the perfect recipe for a healthy meal.

Ingredients

  • 1 cup quinoa

  • 4 cups water

  • pinch of salt

  • handful chopped walnuts

  • 1 cup crumbled cottage cheese

  • 1 cup frozen peas blanched

  • Basil Vinaigrette
  • 1 cup basil leaves

  • 1/2 onion finely chopped

  • 2 cloves minced garlic

  • 1/2 cup olive oil

  • 1 tbsp chopped coriander

  • 3 tbsp white vinegar

  • 1 tbsp honey

  • 1 tsp red pepper flakes

  • salt and pepper to taste

Directions

  • Combine the quinoa and water in a sauce pan. Season it with salt and let it cook on medium heat until the water is absorbed. Turn the heat off and cover the quinoa. Allow it to steam for 10 minutes until the quinoa grains are al dente.
  • While the quinoa is cooking, combine the ingredients for the basil vinaigrette in a blender. Blend until the dressing is smooth. Taste and adjust the salt and pepper. Add additional honey if you like the dressing sweet. 1 tbsp was enough for us.
  • In a large combine the quinoa, peas, cottage cheese and drizzle the dressing on top. Mix together well. Add the chopped walnuts and serve.
  • You can serve the salad warm or cold too.
Posted on

Pesto Chicken Sandwich

Pesto-chicken-sandwich-recipe-spoonful-stories

Pesto Chicken Sandwich are the quickest, tastiest and most heartiest meals you’ll ever have! 

If you have leftover chicken breasts or a jar of pesto then you can easily make these Pesto Chicken Sandwiches. They are easy to make and attractive for a cozy dinner. 

I’m going to keep this article short and sweet because this sandwich speaks for itself. I know it’s an absolute nightmare to shoot sandwiches but this grilled sandwich recipe is worth a try! 

Salty pesto slathered over a toasty multigrain bread and piled high with mozzarella, onions and shredded chicken. All the good things into one delicious sandwich!

This grilled chicken sandwich is one of my favourite weeknight dinners ideas. It is delicious and generously sized. I assure you that no one is leaving the table hungry! And it’s the best way to use leftover pesto and chicken breasts. 

pesto-chicken-stuffing

Pesto Chicken Sandwich Stuffing

For the sandwich filling I have simply used the leftovers from my fridge. I had half a jar of pesto, grilled chicken breasts, onions, and sun dried tomatoes. In a large bowl shred the chicken using a fork and mix it with pesto using a spatula and your filling is ready! 

If you want a slightly creamy texture, mix in some greek yogurt to the pesto chicken mixture and toss it together. If you cannot find greek yogurt or do not want to specially buy one for the sandwiches, substitute it with mayonnaise. 

Other than sun dried tomatoes and onions you can add other vegetables and ingredients too. Pine nuts, green chillies, dried cranberries, arugula, lettuce, baby spinach and freshly cut tomatoes are a few options that can be used. 

Which bread to use? 

I personally prefer using multigrain bread for sandwiches. 

Multigrain bread gives the cheesy and gooey sandwiches a healthy side to them! Multigrain bread is rich and grain studded that can stand up lots of flavour. 

Sourdough is tangy and crusty. It is the ultimate grilled cheese bread for grown ups. But sourdough toasted in olive oil and topped with pesto, grilled chicken, tomatoes and mozzarella is the perfect combination. 

Ciabatta, this Italian white bread is spongy but firm with a forgiving crust. When you’re making a sophisticated, complex, grown up grilled cheese sandwich you need something sturdier than a slice of white bread.  

It is by far one of the easiest preps I’ve ever done. Pair it with the Lemon Herb Grilled Chicken Salad for the perfect weeknight dinner!

Pesto Chicken Sandwich

Recipe by Ishana PassiCourse: Non-Vegetarian, Side DishDifficulty: Easy
Servings

4

servings
Prep time

5

minutes
Cooking time

5

minutes
Total time

10

minutes

Pesto Chicken Sandwich are the quickest, tastiest and most heartiest meals you’ll ever have! 

Ingredients

  • 4 boneless chicken breasts, boiled

  • 3 tbsp pesto

  • 1/4 tsp pepper

  • 1/2 cup shredded mozzarella

  • 8 slices multigrain bread

  • 1 tbsp sun dried tomatoes sliced

  • Butter to spread on the bread

Directions

  • In a large bowl shred the chicken using a fork. Add the pesto and mix well together using a spatula or fork. Spread the butter on all the bread slices on both sides of the bread.
  • Sprinkle mozzarella, pepper and sun dried tomatoes on 4 bread slices. Add the layer of chicken on top and place the remaining 4 buttered bread slices on top.
  • In a flat pan, heat some butter on low heat and toast the sandwiches. Keep turning the sandwiches until browned on both sides. Toast depending on how crispy you want the bread or until the cheese melts.
Posted on

Tom Kha Gai

Tom-Kha-Gai-Soup-Spoonful-stories.

Need a delicious and flavourful soup ready under 30 minutes, then this is the perfect choice for you! It is Rich and creamy, silky and aromatic, tangy and salty. Tom Kha Gai (Thai Coconut Chicken Soup) is a complete meal in itself. It is light but filing at the same time and bursting with fresh flavours! This is the best Tom Kha Gai recipe you’ll come across.

This authentic Thai soup is made with the classic combination of chicken and coconut. It gets its rich flavours from the classic Thai ingredients; galangal, lemongrass, coconut milk, fish sauce, Thai basil, chilli paste and kaffir lime. All these fresh and divine ingredients make the soup smell so heavenly. 

This Thai Coconut Soup is truly comforting and comes together quickly. Obviously if you have it the next day it’s even better. This way the flavours have time to rest and meld within the rich and tangy broth. So don’t think twice before doubling the recipe and saving some for the next day.

Tom Kha Gai is healthy, comforting, creamy, sweet, salty, bright, tangy and aromatic! 

Secret Ingredient for Tom Kha Gai

Want the soup to taste exactly as it would in Thailand? Simply add red curry paste to the soup for an authentic Thai taste. Using this secret ingredient also makes it easier to make this soup on a regular basis. If you are not able to get a hold of the galangal, use ginger instead and substitute lime for kaffir lime leaves. 

Ingredients for Tom Kha Gai

The good thing about this delicious recipe is that all ingredients should be easily available at your grocery store. It doesn’t require too many weird ingredients. 

Coconut milk – The base of the Thai coconut chicken soup is made with coconut milk. This is the ingredient that makes it different from other soups. The coconut milk gives the soup a rich and creamy texture. If coconut milk is not available you can use coconut cream instead. 

Galangal – Galangal is known as Thai ginger. Galangal adds a significant taste to the soup. It is different from ginger, but if galangal isn’t available use ginger instead. Most of the time, vegetable shops don’t have galangal. So this is a hard ingredient to get a hold of! 

Lemongrass  and Kaffir Lime Leaves – These two ingredients add the most flavour to the soup which makes a world of a difference. Make sure you don’t miss them! Lemongrass and Kaffir Lime Leaves are authentic Thai ingredients which should be easily available. 

Vegetables – I have mainly used carrots, beans, mushrooms and onions. Feel free to add your favourite vegetables to add more flavour and texture to the soup. Snow peas and  broccoli are good options too.

Vegetable or Chicken Broth – To balance the creamy texture of the coconut milk in the soup, and to get a soupy consistency it is important to add vegetable or chicken broth. Vegetable and chicken broth are flavourful itself, thus enhancing the flavour of the soup. 

The other ingredients used in the soup are lime juice, fish sauce, light soy sauce, red Thai curry paste and garlic. 

Serve this chicken soup with the Asian Kale Salad or Spicy Thai Peanut Noodles to make it the perfect Thai cuisine meal! 

Tom Kha Gai

Recipe by Ishana PassiCourse: Non-Vegetarian, Side DishCuisine: ThaiDifficulty: Easy
Servings

6

servings
Prep time

5

minutes
Cooking time

35

minutes
Total time

40

minutes

Ingredients

  • 1 tbsp olive oil or coconut oil

  • 1/2 onion sliced

  • 1/2 cup mushroom sliced

  • 2 cloves garlic minced

  • 4 quarter inch slices galangal or ginger

  • 4 cups chicken broth

  • juice of 1 lime or lemon

  • 1 lemongrass stalk, pounded with a knife and cut into 2 inch long pieces

  • 1 tbsp fish sauce or Worcestershire sauce

  • 2 1/2 tsp red Thai curry paste

  • 3-4 kaffir lime leaves

  • salt according to taste

  • 1 spoon sriracha

  • 1/4 cup carrots sliced

  • 1/4 cup green beans sliced

  • 2 tsp light soy sauce

  • fresh cilantro chopped for garnish

  • 1/2 can or 250 ml coconut milk or cream

  • 2 medium chicken breast cut into bite size

Directions

  • In a large pot, heat the olive oil over medium heat and saute the garlic, red Thai curry paste, lemongrass, kaffir lime leaves, galangal, onion, and cook stirring frequently for 5 minutes.
  • Add the chicken broth and bring to a boil. Allow it to simmer for 20 minutes, uncovered.
  • Add in the coconut milk, chicken pieces, mushrooms, beans and carrots. Strain out the galangal, lemongrass, kaffir lime leaves and discard. Simmer until chicken is just cooked through, add the lime juice, soy sauce, sriracha, fish sauce and salt.
  • Allow it to cook for 2-4 minutes. Serve hot and garnish with freshly chopped coriander.
Posted on

Chicken Bao Buns

Crsipy-Chicken-Bao-Recipe-Spoonful-Stories

Soft and fluffy, sweet and spicy, succulent and crunchy! These steamed mini Chicken Bao Buns are perfect for a fancy dinner party! Craving pan asian? This recipe is the answer for all your pan asian cravings!

Studying in London for the past two years my favourite go to restaurant has always been Ping Pong at Carnaby Street. Whenever I’d go there I always had to order the Crispy Duck Bao. It has always been my favourite dish! This dish is inspired by the Crispy Duck Baos at Ping Pong London! During the lockdown period last month I was craving the baos so badly and decided to recreate the dish with my own little twist. 

Chicken Baos are amazingly delicious and even easier to make. But let me warn you, they do take a bit of time. But it’s definitely worth the wait! Other than the proving time for the dough there’s not much waiting. 

In this recipe, the crispy chicken helps to create tasty sliders and the steamed bao buns gives it a soft and fluffy bite with contrast to the crispy cucumber and chicken. 

Dough

Chicken-Bao-dough-recipe-Spoonful-stories

The buns are soft, fluffy and light! All that is required is flour, milk, butter, water, sugar, salt and yeast! Yes it’s that simple, but you just need to be patient for the dough to prove. The dough requires 90 – 120 minutes to prove. 

Knead the dough with all the ingredients mentioned for the dough and place it in a large bowl. Cover it and set aside in a warm dry place for 90 – 120 minutes. When the dough is double the size of what it was, knead it again and roll into small balls. With the help of a rolling pin, roll each ball into mini ovals and brush with olive oil. Fold the dough over using a straw or a chopstick in between to leave a little space in the middle. Place them on a baking tray and allow them to rest for 45-60 minutes. 

Bao-buns-dough-fold-spoonful-stories

Sauce for Chicken Bao Buns

The sauce for the chicken is quick and tasty. It is simply a mixture of sesame oil, honey, brown sugar, sriracha, ginger garlic paste, paprika, salt, soya sauce and vegetable oil. Simply in a hot pan mix all these ingredients and bring it to a boil. Once the sauce is ready and the chicken is cooked, coat the chicken in the sauce. 

Crsipy-chicken-bao-sauce-spoonful-stories

Before you make the sauce it is important to marinate the chicken for minimum an hour as this will enhance the flavour of the chicken. 

Also, marinating the chicken in buttermilk will make the chicken bao extra crispy! So don’t miss this essential step.

Want to make this a healthy meal? Pair it up with the Asian Kale Salad and have a healthy pan asian meal.

The bao bun recipe is any pan asian foodie lovers favourite recipe, make sure to try this. If you have any suggestions  or queries please do drop them below in the comments sections. 

Chicken Bao Buns

Recipe by Ishana PassiCourse: Non-Vegetarian, Side DishDifficulty: Medium
Servings

15

servings
Prep time

3

hours 
Cooking time

30

minutes
Total time

3

hours 

30

minutes

Soft and fluffy, sweet and spicy, succulent and crunchy! These steamed mini Chicken Baos are perfect for a fancy dinner party!

Ingredients

  • Bao Buns
  • 400 gm flour

  • 2 tbsp sugar

  • pinch of salt

  • 2 tsp instant dried yeast

  • 3 tbsp softened butter

  • 3 tbsp milk

  • 200 ml warm water

  • Chicken Marinade
  • 2 tbsp buttermilk

  • pinch of salt

  • pinch of pepper

  • 1/4 tsp garlic powder

  • 4 chicken breasts cut into bite size

  • Crispy Coating
  • 1/2 cup flour

  • 1 tsp salt

  • 1 tsp black pepper

  • 1/2 tsp garlic powder

  • 1 tsp dried thyme

  • 1 tsp baking powder

  • 1 tsp paprika

  • 1 tsp chilli flakes

  • vegetable oil for deep frying

  • Sweet and Spicy Sauce
  • 2 tbsp honey

  • 4 tbsp brown sugar

  • 1 tbsp vegetable oil

  • 1 tbsp sesame oil

  • 2 tsp ginger garlic paste

  • 3 tbsp soya sauce

  • 2 tbsp sriracha

  • To Garnish
  • 1 onion finely sliced

  • 1/2 cucumber finely sliced

  • 1 tsp chopped coriander

Directions

  • For the bao buns, place sugar, salt, yeast in a large bowl. In a jug warm the milk, water and butter. Stir the butter mixture in the flour with a spoon and then with your hands. Knead the dough for 10 minutes on a floured surface.
  • Transfer the dough into a large oiled bowl. Cover with clingfilm and set aside in a warm dry place for 90 – 120 minutes.
  • Place the chicken in a bowl for marination, add all the ingredients for the marinade. Mix well and place in the fridge for 1 hour.
  • After the dough has proved and is double in size, knead it for 5 minutes on a floured surface. Divide the dough into 15 balls. On a floured surface roll each ball into an oval using a rolling pin.
  • Dab the ovals with olive oil and fold over into half, using a straw or chopstick to leave space in between. Place the buns on parchment paper on a baking tray. Cover with clingfilm and allow it to rest for 45 – 60 minutes.
  • In the meantime for the fried chicken, heat the oil in a large wok or your deep fryer. Mix the crispy coating ingredients together in a bowl and take the chicken out of the fridge. Take one piece of a chicken at a time and coat the chicken in the crispy coating mixture. Make sure it fully coated and place on a plate. Repeat this with all the pieces.
  • Once oil is hot, add in 8-10 pieces of chicken depending on the size of your pan. Cook until golden brown and fully cooked. Keep aside.
  • For the buns, put a large steamer on and in batches place the buns in the steamer. I use a double layer steam, placing 4 buns in each layer. Steam them for 10-12 minutes.
  • In the meantime for the sauce, in a hot pan add all the ingredients for the sauce and bring to boil. Allow it to simmer for 5 minutes until thick. Place the cooked chicken in the sauce and toss together nicely.
  • You can leave the chicken chunks whole or slice them. Carefully open the buns and stuff them with the chicken. Garnish with cucumber, onions and coriander leaves and serve hot.
Posted on

Homemade Garlic Bread

heesy-Garlic-Bread-recipe-Spoonful-Stories

Chewy and cheesy centre and a brown crisp crust – this is the best homemade garlic bread recipe ever! I had no idea homemade garlic bread could be delicious and easy to make.

My brother and I used to have garlic bread with every continental dish being made at home. But I never enjoyed it. I knew I had to create a recipe for cheesy garlic bread. A homemade garlic bread recipe that is simple, doesn’t require too much resting and is amazingly delicious! 

Baking the bread from scratch is a time consuming process but makes the entire process satisfying. Nothing compares to freshly baked homemade bread! 

It’s perfect for serving the guests or the family on a cosy night! The dough is buttery, soft and easy to work with. And the flavour is fantastic with fresh garlic, parsley, oregano and rock salt! 

Homemade garlic bread stuffing 

The combination of garlic, butter and parsley is everyone’s favourite! I also add thyme, oregano, gherkins, jalapeños, and olives. Feel free to substitute with any flavours that you like. Replacing parsley with coriander or chilli and lime or, basil and parmesan. 

Homemade-garlic-bread-stuffing-spoonful-stories

Stuffing Tips

  • Butter – I always go for salted french style butter. And it is richer and creamier due to the high fat content which makes it more decadent in taste.
  • Garlic Powder – Even though the recipe includes chopped garlic, I prefer to add garlic powder as well. This allows for more garlic in each and every bite that you take.
  • Parsley – Make sure to use freshly chopped parsley rather than dry parsley. This will add flavour and colour to the bread. 

What type of cheese to use?

I always use a mix of mozzarella and cheddar for pizza and garlic bread because it’s rich and has a wonderful elastic pull to it when melted. Using cheddar on your pizza or garlic bread will taste delicious as well but it will not give you the softness of the mozzarella when baked. But a mixture of two will give you the perfect result. Feel free to add a tablespoon of grated parmesan, this would make a great difference. It will enhance the texture and the taste of the garlic bread. 

In Chandigarh, we don’t have a good supply of cheese. After trying a few different brands easily available, I find the mozzarella and english cheddar mix by Dairy Craft the best. It comes in a brick, so it can be cut, diced or grated. With consistent uniformity and excellent melting properties, it crisps and browns to perfection. 

The next time you have a cozy family Italian dinner, make sure to bake this homemade garlic bread. Everyone on the table will absolutely adore this! 

Homemade Garlic Bread

Recipe by Ishana PassiCourse: Side Dish, VegetarianDifficulty: Medium
Servings

6

servings
Prep time

2

hours 
Cooking time

40

minutes
Total time

2

hours 

40

minutes

Chewy and cheesy centre and a brown crisp crust – this is the best homemade garlic bread recipe ever!

Ingredients

  • 2 1/2 cups flour

  • 2 1/2 tsp dry active yeast

  • 1 1/4 cup milk

  • 1/2 tsp sugar

  • 1/2 tsp salt

  • For the Filling
  • 1/4 cup butter

  • 1/2 cup mozzarella

  • 1 spoon minced garlic

  • 2 tsp choice of herbs

Directions

  • In a bowl combine warm milk, yeast and sugar. Set aside until the mixture is foamy. Gradually mix in the flour and salt and knead into a soft ball. Place the dough in a large bowl and pat it with olive oil. Cover and allow it to rise for 1 hour.
  • In the mean time, make the filling. Mix all the ingredients together except the mozzarella in a small bowl. Set aside.
  • Preheat the oven at 180 C. Roll out the dough on a flat floured surface.
  • Spread the filling over the dough leaving the edges out. Sprinkle mozzarella, olives or any other spices of your choice on the top.
  • Roll the dough into a log like shape lengthwise. Fold the edges.
  • Grease a loaf pan and place the rolled dough inside. Cover and let it rise again for 1 hour.
  • Brush with olive oil and bake for 35-40 min
Posted on

Homemade Cheesy Garlic Bread (No Yeast)

How-to-make-no-yeast-stuffed-cheese-garlic-bread-spoonful-stories

Who wasn’t craving junk food during the lockdown, especially Dominos! So why not make the Homemade Cheesy Garlic Bread (No Yeast)!

Garlic bread is everyones favourite side dish or appetiser at an Italian restaurant. One of the most popular dishes on Dominos menu is their stuffed garlic bread.

I decided to recreate the homemade cheesy garlic bread (no yeast) at home to fulfil my cravings. 

During the lockdown I had my pantry fully stocked, the only thing missing was yeast. But don’t worry, you can use the staples available in your pantry and make a no yeast bread

This homemade cheesy garlic bread (no yeast) is super quick to prepare and the perfect comfort food on a dull day. With a mixture of Italian herbs and pockets of melted cheese, this garlic bread is a wonderful Italian side dish or an evening snack. This recipe is a winner – even the little kids will love it! 

But can bread actually be made without yeast?

Yes, it’s absolutely possible!

The no yeast homemade garlic bread is a dish that can be made last minute if you have guests coming over or if you are in the mood to indulge. The ingredients included for this no yeast cheesy garlic bread recipe are all purpose flour, curd, baking soda, baking powder, sugar, milk and oil. The recipe only requires the everyday staples that are easily available in your pantry. 

The mixture of curd, baking powder and baking soda work as the substitute for yeast. 

I am not a fan of baking with yeast as it requires a lot of patience for the dough to rise. This no yeast bread doesn’t require much kneading which saves a lot of time. 

How to make the dough for homemade cheesy garlic bread?

How-to-make-no-yeast-homemade-cheesy-garlic-bread-dough-mixture-recipe

In a large bowl mix the flour, salt, sugar, baking powder, baking soda, milk, oil and curd. Make sure to use thick curd. Mix it all together until a soft dough is formed. Knead the dough for 8-10 minutes. Cover the dough and leave it to rest for 45 minutes – 1 hour. 

If you wish, this cheesy garlic bread can also be made instantly. There is no need to rest the dough if you are in a rush. 

How-to-make-homemade-cheesy-garlic-bread-dough-recipe

Stuffing for the garlic bread

The filling is super easy and a variety of vegetables can be used. I personally like to have my garlic bread with only a cheese stuffing, making it an extra cheesy garlic bread. 

The filling can be made using sweet corn, mixture of red, yellow and green bell peppers, mixed Italian herbs, grated mozzarella and cheddar. The stuffing can be made according to your taste buds. We will also spread  a garlic and butter mixture on the base of the dough before filling in the stuffing. This would enhance the flavour of the bread. 

How-to-make-no-yeast-homemade-cheesy-garlic-bread-stuffing-recipe

Roll out the dough flat and spread the garlic and butter mixture. Then add the grated mozzarella, cheddar, sweet corn, bell peppers, etc. Use any filling of your choice. Sprinkle some mixed Italian herbs on top and apply oil on the sides of the dough. Now fold this dough into half and seal the edges by pressing both the edges together. 

How-to-make-no-yeast-homemade-cheesy-garlic-bread

Apply the rest of the garlic and butter mixture on top of the folded dough and sprinkle mixed Italian herbs. Make a few vertical cuts on the dough. This would make it easier for you to slice the bread later on. Make sure the cuts are not too deep. 

Transfer the bread on a greased tray. Bake for 20-25 minutes in a preheated oven at 180 celsius. 

Hope this recipe brings joy to your table and don’t keep this recipe to yourself! 

Homemade Cheesy Garlic Bread (No Yeast)

Recipe by Ishana PassiCourse: Vegetarian, VegetarianDifficulty: Medium
Servings

4

servings
Prep time

45

minutes
Cooking time

25

minutes
Total time

1

hour 

10

minutes

This no yeast homemade garlic bread is super quick to prepare and the perfect comfort food on a dull day.

Ingredients

  • 1 cup all purpose flour

  • Salt per taste

  • 1/2 tsp baking powder

  • 1/4 tsp baking soda

  • 1 tsp castor sugar

  • 1 tsp Italian herbs

  • 1 tbsp thick curd

  • 1/4 cup milk

  • 1 1/2 tbsp refined oil

  • 3 tbsp water

  • FILLING

Directions

  • Mix together all the ingredients in a large bowl. Knead until a dough is formed.
  • Keep kneading for 10 minutes. Dab the dough with oil and cover it and set aside to rest for 45 minutes.
  • In the mean time, grate the Mozarella and chop the vegetables for the filling. Melt the butter and mix in the chopped garlic for later use.
  • Roll the dough flat and apply half of the the garlic butter mixture. Add the Mozarella and vegetable stuffing. Apply oil on edges and fold into half. Press the edges together to properly seal the sides.
  • Apply the remaining butter and garlic mixture on top of the folded dough, sprinkle Italian herbs and transfer to a greased tray.
  • Bake for 25-30 minutes at 180 celsius in a preheated oven.
  • Serve hot with any dip of your choice.

Make sure to try the Lemon Herb Grilled Chicken Salad, which goes along perfect with the garlic bread!

Posted on

Green Pea and Peanut Quinoa

How-to-make-pea-and-peanut-qunioa-spoonful-stories

Ever since I was a baby, I have always been fussy about eating green peas. I only started enjoying green peas when I decided to combine it with quinoa. This green pea and peanut quinoa recipe will be every picky eater’s favourite dish! 

Quick and easy, this dish is flavourful and a bowl of healthy comfort food! This quinoa recipe can be served cold as well as warm. It is more like a green pea salad if served cold. It makes for a delicious and healthy side dish or even a healthy summer dinner recipe that goes with anything. 

Every time I cook with green peas it makes me think of my dad. With him its green peas over any other vegetable! This actually reminds me of Nigella Lawson. She absolutely loves green peas! In Fact most of her renowned savoury recipes are to do with peas. 

The best part about peas is that they are a nutritional powerhouse despite the sweetness they have. This green pea and peanut quinoa recipe is fluffy, tasty and high in protein. Quinoa being complete protein and when peas are paired with it, it’s added protein. Quinoa also provides you with lots of minerals and healthy fats making it an easy healthy recipe.

It not only serves as a great side dish but also perfect to pack as a lunch box! 

Fresh or frozen peas?

As peas are not available all year round, it’s okay to use frozen peas for this recipe. This recipe works great with fresh or frozen peas, use whatever is available. Majority of the time I have made the recipe with frozen peas and the taste is the same. So it doesn’t really make a difference. This is also an added advantage. You can make this dish as a quick fix if you want to put together something at the last minute. 

This green pea and peanut quinoa recipe has an Indian touch to it. It is sautéed in olive oil, curry leaves and black mustard seeds to give it a taste of those flavours. I have adapted this recipe from the famous Indian dish, Poha (flattened rice). Poha is a Western Indian breakfast recipe but its flavours are known all over the country. It has been a tradition in my family since many years to have Poha for breakfast every Sunday morning. 

This recipe is a one pot recipe.

One pot quinoa and fresh peas

Start by boiling the peas in a medium sized pot. Once the peas turn bright green and slightly soft, rinse them under cold water. Keep them aside. Next boil your quinoa in the same put in chicken or vegetable stock. You can also boil it in simple water. When the quinoa is cooked and all the liquid in the pot is absorbed, turn off the heat. Allow the quinoa to rest for 5-8 minutes. 

Fluff the quinoa with a fork and mix it with the peas. 

How-to-make-pea-and-peanut-qunioa-spoonful-stories

Sauté the pea and quinoa mixture in olive oil, mustard seeds and curry leaves. Cook until the quinoa is fragrant and add a handful of peanuts. Serve hot and garnish with chopped parsley if you want. This dish is sure to make you feel happy and satisfied! 

Green Pea and Peanut Quinoa

Recipe by Ishana PassiCourse: Sides, MainDifficulty: Easy
Servings

4

servings
Prep time

10

minutes
Cooking time

25

minutes
Total time

35

minutes

Quick and easy, this dish is flavourful and a bowl of healthy comfort food!

Ingredients

  • 1/2 cup uncooked quinoa

  • 1 cup raw green peas

  • 1 cup vegetable stock

  • 1 tsp black mustard seeds

  • Handful of fresh curry leaves

  • 1 tbsp olive oil

  • Handful of peanuts

Directions

  • In a medium size pot, boil the green peas until bright green and slightly soft. Rinse them under cold water, drain and keep aside.
  • In the same pot, bring to boil the vegetable stock. Add the quinoa, cover and let it cook on low heat. Keep it on low heat until all the liquid is absorbed by the quinoa and is fully cooked. Remove from the heat and allow it to rest for 5 minutes.
  • Fluff the quinoa with a fork and mix it with the green peas.
  • In a medium size pan, heat the olive oil. Add the black mustard seeds and curry leaves. After a few seconds, add the quinoa and peas mixture and the peanuts and sauté for 1-2 minutes. Cook until the quinoa is fragrant.
  • Remove from heat and serve hot.

Make sure to try the Greek Watermelon and Cottage Cheese Salad!