Posted on

Vegan Green Thai Curry

Vegan-Green-Thai-Curry-Spoonfulstories

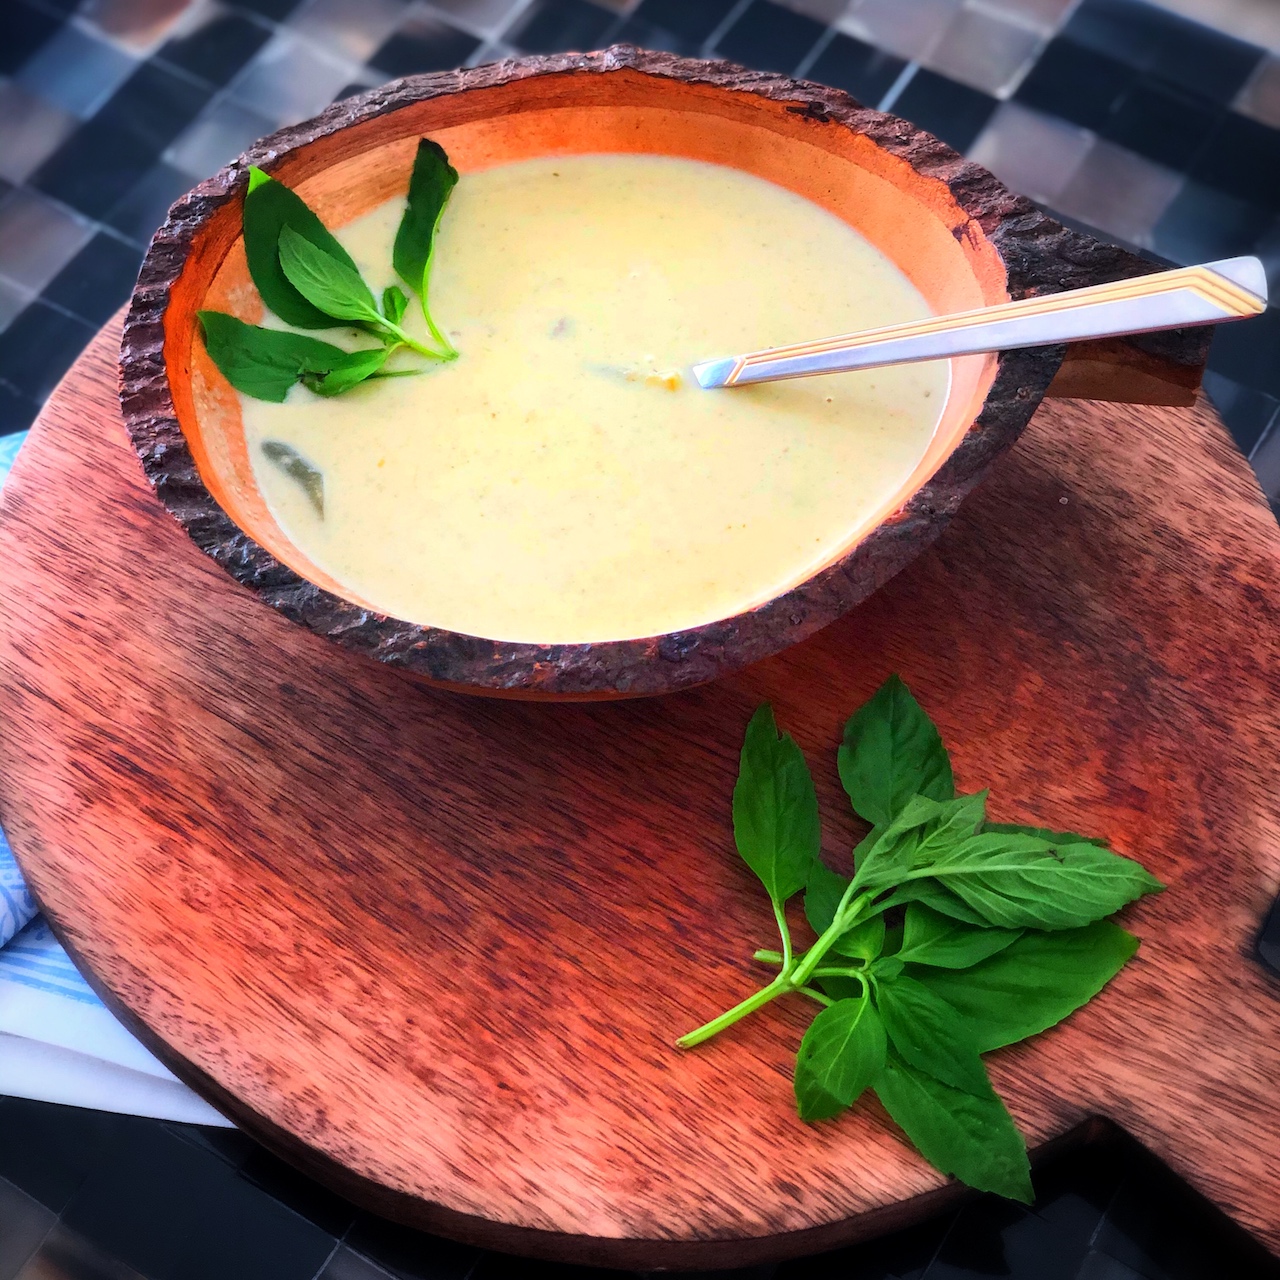
Who doesn’t love Thai food? I bet everyone’s first Thai dish has always been the Thai curry! I was first introduced to Thai cuisine with the Thai red curry, and ever since Thai has been my favourite cuisine. This Vegan Green Thai Curry is rich and creamy, packed with fresh vegetables, full of authentic Thai flavours and simple enough for weeknight dinners. 

Ever since we have planted lemongrass at home, we pretty much make this Vegan Thai Green Curry every week. It tastes as good as a restaurant dish. We made it three days back, and barely a few days later, there we were craving a green curry again. It is amazingly delicious and you can have it without getting tired of it. I use all the produce I have at home from carrots, green beans, broccoli, zucchini or even green peas. 

Tip – Always use canned coconut milk rather than the tetra pack. The tetra pack coconut milk is watery and doesn’t have the authentic coconut milk taste. For more information on coconut milk, ready my post on the Coconut and Lime Chicken.

green-thai-curry

Who wouldn’t love this vegan Thai curry? It’s hard to come across a person who wouldn’t like its delicious, well balanced flavours – spiciness soothed by the coolness of the coconut milk and set against the freshness of coriander, lime leaves and lemongrass. Because this is a vegan curry I have not used fish sauce and shrimp paste, even though fish sauce and shrimp paste are essential Thai ingredients. 

Vegan Green Thai Curry Paste

Because it is impossible to find vegan Thai curry paste that doesn’t have fish sauce or shrimp paste, so I never use store bought Thai curry paste, I always make it fresh from scratch. The curry paste is simple to make and can be made with easily available ingredients. It is not time consuming at all like the chefs in Thailand who sweat it all out to make the paste. Just grind all the ingredients together and that is it! 

The ingredients required for the curry paste are – 

  • Ginger
  • Green chilli
  • Onions
  • Garlic
  • Lemon zest
  • Coriander powder
  • Cumin powder
  • Turmeric powder
  • Salt 
  • Coriander leaves and stem

If you really like your curry spicy, then add in more green chilli. You can also add in a few sliced Thai red chilli in the curry. 

How to serve the curry?

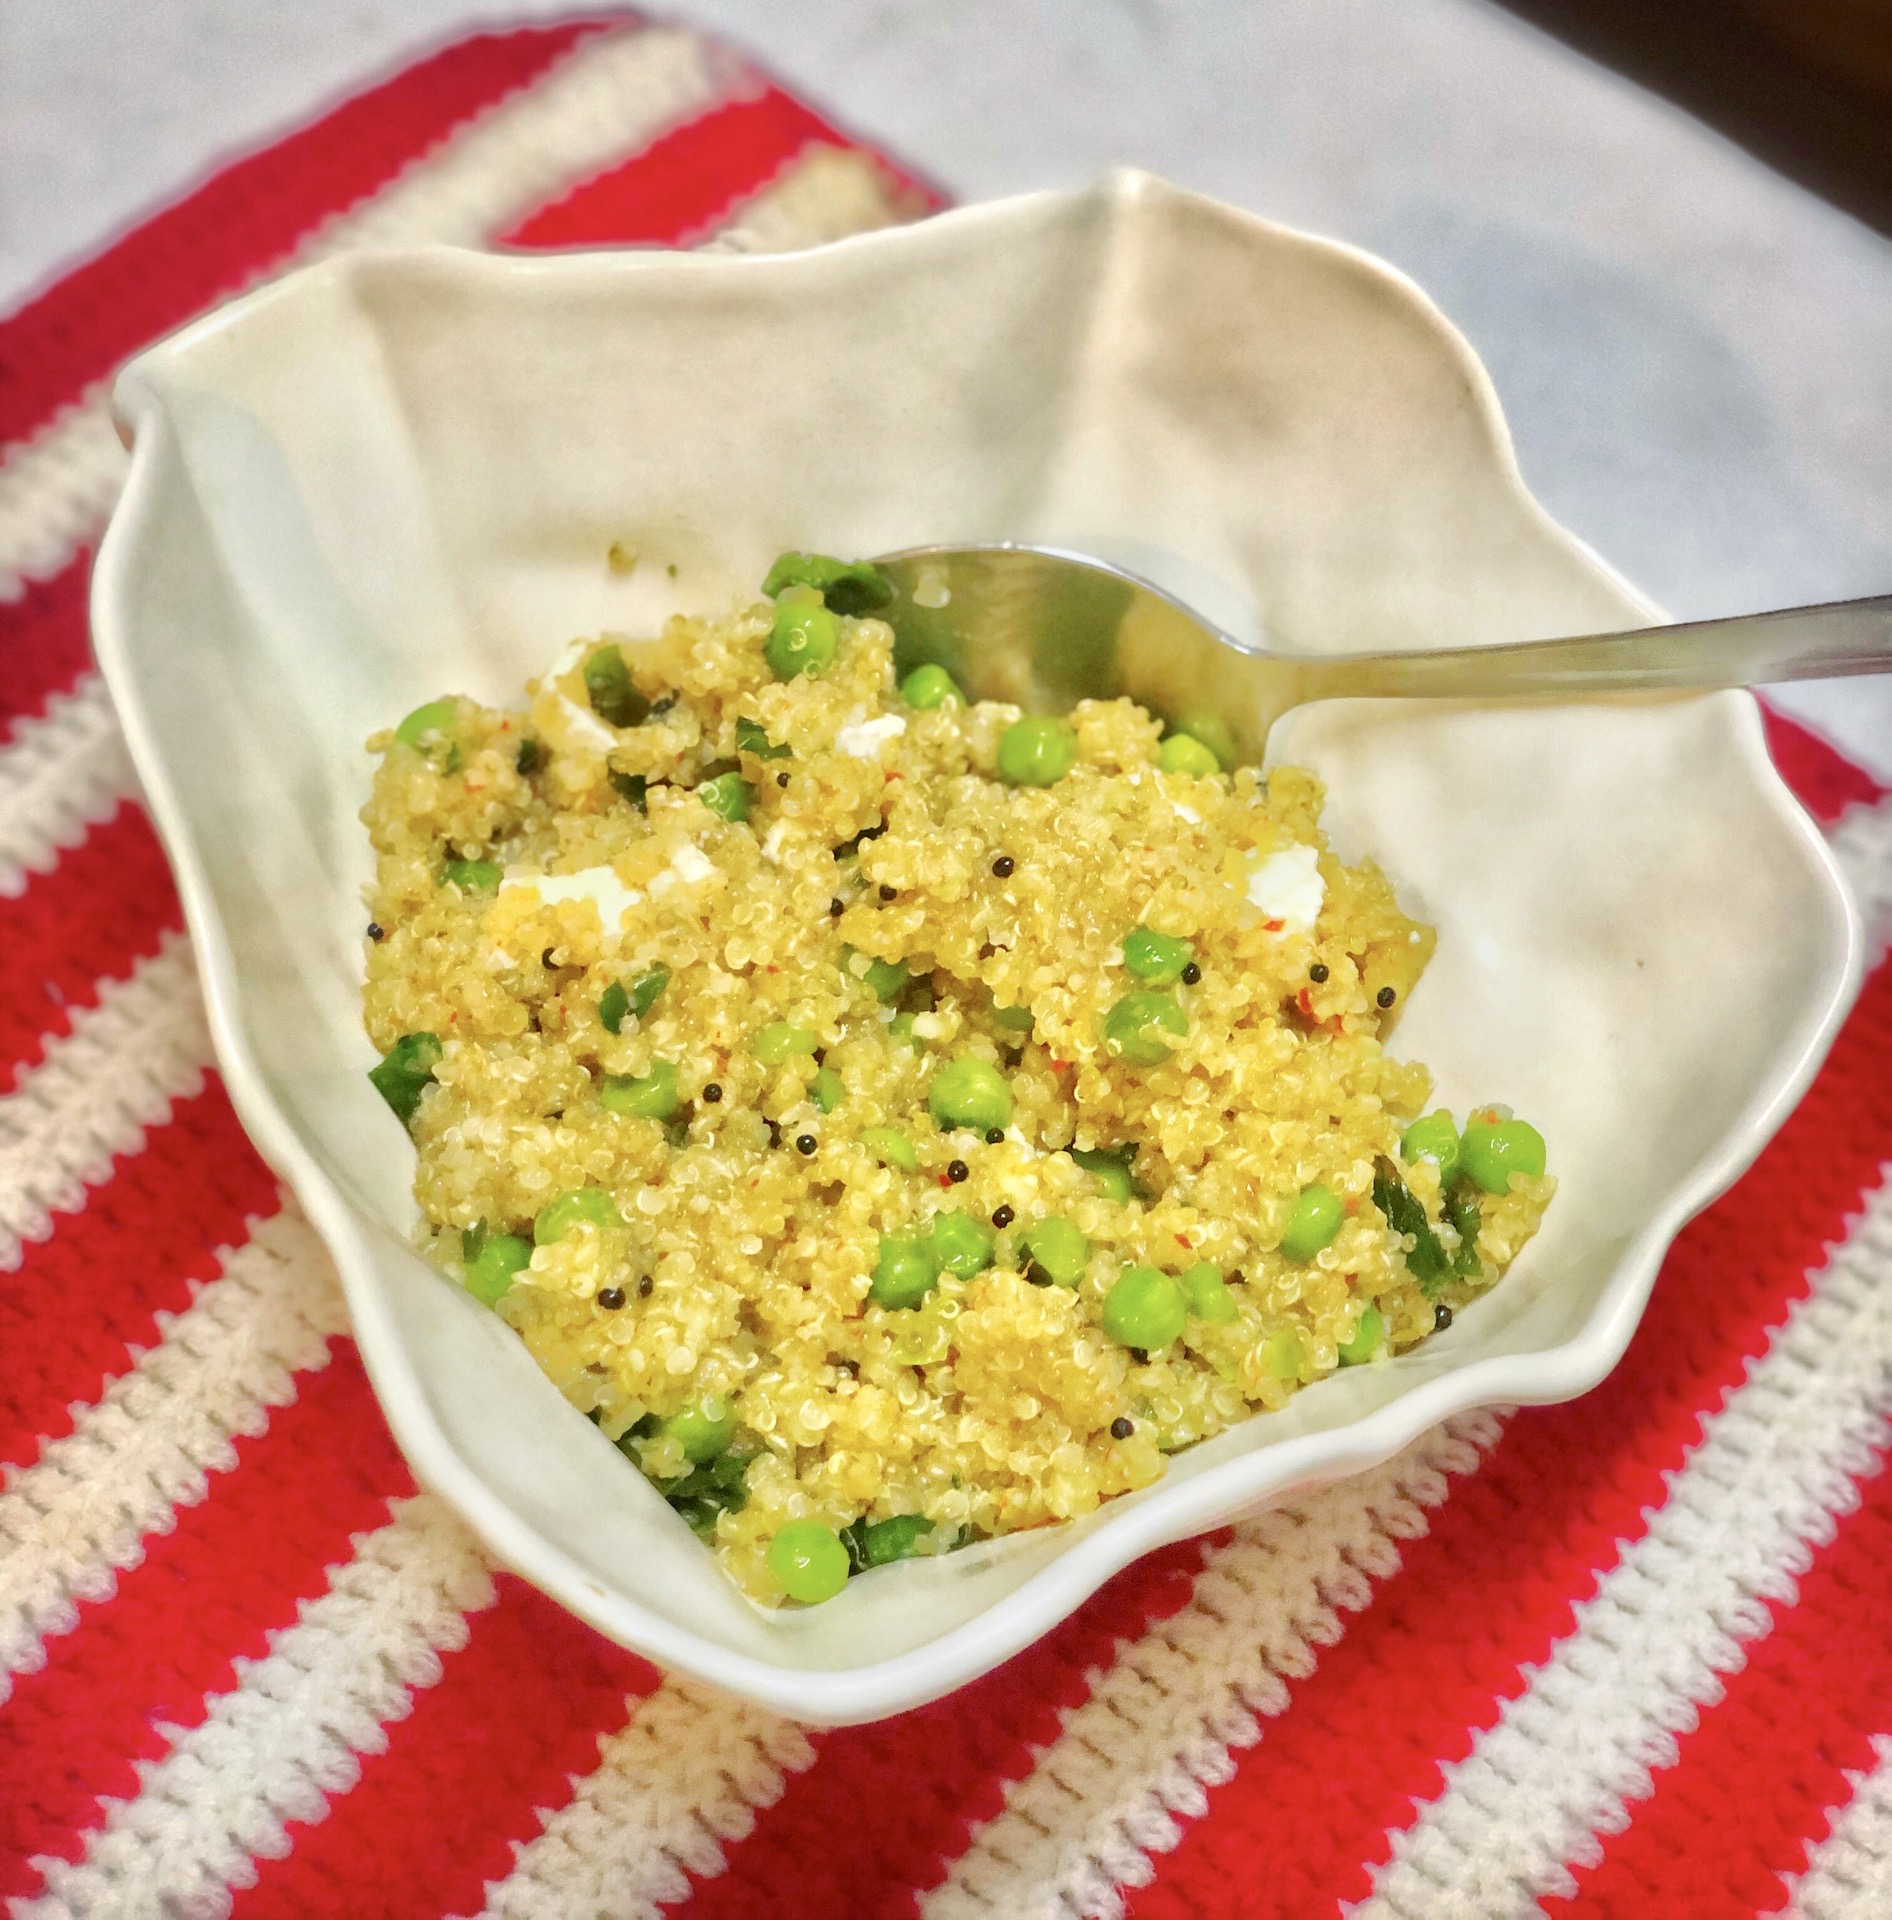
I always serve the Vegan Green Thai Curry with steamed long grain rice or jasmine rice. But if you want to give it a healthy twist, I bet quinoa would be a great alternative to serve the curry with. 

As it is the curry is loaded with vegetables, I like to enjoy the curry by itself along with steamed rice. But if you do want a side dish you can serve it with

Pairing it up with a fresh and juicy salad is a good idea, to make it a full and refreshing meal! 

If you make my Vegan Thai Green Curry, do not forget to tag me on Instagram as @spoonfulstoriesbyishanapassi I simply love seeing your takes on my recipes! 

Vegan Green Thai Curry

Recipe by Ishana PassiCourse: Main Dish, VeganCuisine: ThaiDifficulty: Medium
Servings

6

servings
Prep time

15

minutes
Cooking time

30

minutes
Total time

45

minutes

This Vegan Green Thai Curry is rich and creamy, packed with fresh vegetables, full of authentic Thai flavours and simple enough for weeknight dinners. 

Ingredients for curry paste

  • 3 green chilli, chopped

  • 2 tsp lemon zest

  • 2 tbsp galangal or ginger, grated

  • 5 cloves garlic, chopped

  • 1 tsp ground cumin

  • 1 tsp ground coriander

  • 1/4 tsp turmeric powder

  • 1/3 cup coriander leaves and stems

  • 2-3 tbsp water

  • juice of 1/2 lemon

  • Thai Curry Ingredients
  • 2 tbsp coconut oil / olive oil

  • 3-4 lime leaves

  • 1-2 thai red chilli, sliced

  • 4-5 lemongrass stalks, chopped and trimmed

  • 2-3 tsp coconut sugar

  • 1 cup vegetable broth or water

  • 1 can coconut milk, full fat

  • 1/3 cup peas

  • 1 small carrot, chopped

  • 1/3 cup green beans, chopped

  • 1/3 cup broccoli, chopped

  • 1-2 tsp soy sauce

  • 5 thai basil leaves

Directions

  • Combine all the ingredients of the curry paste in a blender. Blend it to a fine paste until it becomes nice thick paste. Use this paste for the Thai curry.
  • Heat oil in a heavy based pan. Add the lemon grass and saute for a minute.
  • Add the curry paste and kaffir lime leaves. Cook for 3-5 minutes until cooked and dried out.
  • Add the broth, coconut milk, sugar, soy sauce and mix well.
  • Add in all the vegetables and let it simmer for 13-15 minutes.
  • Taste the curry and accordingly adjust. Add more salt for saltiness or sugar for sweetness.
  • Serve warm with steam rice.
Posted on

Sweet and Spicy Sriracha Crispy Tofu

tofu-sriracha-sauce-spoonful-stories

A Sweet and Spicy Crispy Sriracha Tofu recipe that tastes just like Chinese takeaway! This tofu is sweet, fiery, flavourful and totally vegan! It is tossed in a sweet and spicy sriracha sauce and is ready within 20 minutes!

This is truly one of my favourite tofu recipes! I am sure you have heard many people say that tofu tastes like cardboard, but this recipe is a complete game changer and I can guarantee you that it is not true! The Sweet and Spicy Crispy Sriracha Tofu is garnished with crispy onions and served with fluffy jasmine rice and definitely rivals take out options.

This recipe is always my go-to recipe whenever I have to host a dinner without any prior notice or if I am craving Chinese take-out! I completely rely on this recipe because it is quick, versatile, perfect for meal prepping and doesn’t require much cleaning up afterwards. And most of the time I have all the ingredients stocked up in my pantry, so it is easy to make even when I am not in the mood to cook.

Sweet and Spicy Crispy Sriracha Tofu Sauce

The sweet and spicy sriracha sauce is the most addictive homemade asian stir fry sauce!! It is everything you want in an Asian dish, sweet, spicy and perfectly stick to coat your crispy tofu pieces.

You can adjust the spiciness level according to your taste, but I like mine to be super fiery! So I added 3 tablespoons of sriracha. The other ingredients required for the sauce are sugar, soy sauce, minced garlic and cornstarch. 

What is tofu?

Tofu, also known as bean curd is made by coagulating soy milk and pressing the curd into solid blocks (tofu blocks) of varying softness. It can be silken, soft, firm or extra firm. Just like the process of cheese. Tofu is quite mild in taste. But it has a slight sweetness and creaminess from the soy milk. 

How to cook tofu?

  • Open the packaging, and gently place the block of tofu on a plate. Remember to be very gentle while opening the packaging as the block can easily break.
  • Gently wrap the tofu in a few paper towels and give it a gentle press until most of the water is out. Or you can place a baking tray or a plate on top of it as well. Leave it for 15 minutes until the water is drained out.
  • Unwrap the tofu and place it on a chopping board. Cut it into bite size cubes. 
  • Dust the tofu with cornstarch, olive oil and salt until all cubes are well dusted. 
  • Arrange the tofu evenly on a parchment paper lined baking tray and bake for 15 minutes.
  • Flip and bake for another 15 minutes, until the pieces are crispy and lightly brown.

The tofu cubes are crispy on the outside and fluffy and moist on the inside.

Is tofu gluten free?

Tofu is made out of soy milk, water and curdling agent. So, plain tofu is gluten free. All flavoured tofu might not be gluten free, so make sure to check the label.

What to serve this Sweet and Spicy Sriracha Crispy Tofu?

A bowl of rice is a must! 

You can also serve it with a bowl of veggies. Because the flavour of the sauce is intense i recommend to serve it with milder dishes such as steamed veggies, plain rice or clear soup. Or something fresh like the Asian Kale Salad.  

This Sweet and Spicy Sriracha Crispy Tofu is best served warmed and immediately. It is still tasty the next day but the texture of the tofu won’t be the same. 

Sweet and Spicy Sriracha Crispy Tofu

Recipe by Ishana PassiCourse: Main Dish, VeganCuisine: ChineseDifficulty: Medium
Servings

6

servings
Prep time

30

minutes
Cooking time

15

minutes
Total time

45

minutes

A Sweet and Spicy Crispy Sriracha Tofu recipe that tastes just like Chinese takeaway!

Ingredients

  • 1 block extra-firm tofu

  • 1 tbsp olive oil

  • 1 tbsp cornstarch

  • 1/4 tsp salt

  • Sweet and Spicy Sriracha Sauce
  • 1 cup water

  • 2-3 tbsp sriracha sauce or hot chilli sauce

  • 5 tbsp low sodium soy sauce, tamari for gluten free

  • 2-3 cloves minced garlic

  • 1/3 cup sugar

  • 2 tbsp cornstarch + 1/4 cup water. for thickening

  • crispy fried onions fro garnishing

Directions

  • Wrap the tofu in paper towels. Place it on a plate and place another plate on top of it. Let the tofu press for 15-30 minutes.
  • Preheat the oven at 200 degrees C and line a baking tray with parchment paper.
  • Unwrap the tofu and slice it into bite size cubes. Dust them with cornflour, olive oil and salt. Coat all the pieces well.
  • Arrange them on the prepared baking tray. Bake for 15 minutes. Flip and bake for another 15 minutes until crispy.
  • Sauce
  • In a large pan, add all the ingredients for the sauce into the pan except the water and cornstarch.
  • Bring this mixture to a boil and let it cook for 2-3 minutes.
  • Mix the cornstarch and water in a small bowl and add it to the pan. Whisk the sauce over medium heat constantly for a few minutes to avoid lumps being formed, until the sauce thickens.
  • Now add in the crispy tofu and stir well to coat all cubes.
  • Serve immediately with steamed rice.
Posted on

Coconut Lime Chicken

Coconut-Lime-Chicken-Spoonful-Stories

This Thai inspired Coconut Lime Chicken is comforting, delicious and easy to make. It is made with chicken breast that is simmered in creamy coconut milk, fresh lime juice, cilantro and red pepper flakes and ready under 30 minutes!

It’s been awhile since i’ve created a Thai inspired recipe, so I am really excited for this. And I love Thai! I have also been getting quite a few requests for the recipe for this dish so I am eager to see how many of you will make this dish! I had some left over coconut milk, and I decided to make a chicken dish out of it. This recipe is ideal for weeknights or if you have guests coming in last minute. 

The sweetness of the coconut milk combined with the freshness and tanginess of the lemon juice and spiciness of the red pepper flakes is truly one of the best combinations!  This dish is best served steamed rice.

Coconut Milk

Coconut milk is the hero of this Thai inspired creamy Coconut and Lime Chicken dish.  It gives the dish a creamy texture, nuttiness and sweetness. Also, as coconut milk is thick itself, you do not need a thickening agent. 

There are many varieties in the market when it comes to coconut milk. So here are a few tips to help you choose the right one.

Unsweetened – Make sure to buy unsweetened coconut milk. Coconut milk itself is on the sweeter side, whereas sweetened coconut milk and cream of coconut both contain added sugar and are often placed near the coconut milk in shops. 

Canned – Many varieties are available like I said. Canned, boxed, powder or refrigerated. Make sure to buy the canned coconut milk, this usually placed near the Asian sauces. Canned coconut milk is the most flavourful.

Full Fat Milk – For the best taste and texture use full fat coconut milk. Lite coconut milk obviously has less fat, but then tends to  be watery. This will not give you a rich and creamy texture.

Shake the can – It’s important you shake the can before opening it, because there is often a white solid layer on top that is formed which is known as coconut cream. Vigorously shake it before opening to combine the cream and liquid together. 

My favourite brand to use is Chaokoh Coconut Milk. It is easily available in most of the grocery stores. It truly tastes and looks the best, the perfect texture you would want for your Coconut and Lime Chicken. The other brand that you can also use is Real Thai Coconut Milk. This is equally good. 

Recipe tips and notes for Coconut Lime Chicken

  • Like the spice? If you like your food spicy, try adding in a few chopped Thai Chilli Pepper.
  • Fish Sauce – Try adding in a tsp of fish sauce to enhance the flavour of the dish. It is completely optional but it will give the dish a more authentic Thai flavour. I haven’t included it in the recipe since many people don’t stock up on fish sauce. Fish sauce and even Lemongrass would be a great addition to the dish.
  • Lite Coconut Milk – Feel free to use lite coconut milk, but keep in mind the dish won’t be as rich and creamy as it would be if you use full fat milk. The sauce will definitely be thinner. 
  • Don’t like cilantro? If you are one of those people who don’t fancy cilantro, then leave it out! Instead you can use basil or lime leaves. 

Want to try more Thai inspired recipes?

Coconut Lime Chicken

Recipe by Ishana PassiCourse: Main Dish, Non-VegetarianCuisine: ThaiDifficulty: Medium
Servings

4

servings
Prep time

15

minutes
Cooking time

30

minutes
Total time

45

minutes

This Thai inspired Coconut Lime Chicken is comforting, delicious and easy to make.

Ingredients

  • 500 gm boneless, skinless chicken breast

  • 2 tbsp olive oil

  • 1 tbsp butter

  • 1 onion, sliced

  • 1/2 cup chicken stock

  • 1 can full fat, unsweetened coconut milk

  • 2 tbsp lemon juice

  • zest of 1 lemon

  • 2 tbsp freshly chopped cilantro

  • 1 tbsp red pepper flakes

  • salt and pepper to taste

  • 2 cloves garlic, minced

  • 1 tbsp honey

Directions

  • Slice the chicken into small chunks and season with salt and pepper.
  • Heat a large pan over medium heat. Melt the butter in it with 1 tbsp oil. When hot, add the chicken and cook until golden brown or slightly cooked. Transfer to a plate.
  • In the same pan, add the remaining oil and cook the onions and the garlic until fragrant. About 30-45 seconds.
  • Stir in the chicken stock, lemon juice, lemon zest, red pepper flakes and honey. Simmer on low heat until reduced by half for about 5 minutes. Keep stirring and scrapping the pan from the sides.
  • Stir in the coconut milk and season with salt and pepper. Add the chicken to the pan and cook until chicken is fully cooked.
  • Stir in the cilantro and serve with steamed rice.
Posted on

Creamy Cajun Spice Pasta

Cajun-Spice-Pasta-Recipe-Spoonful-stories

This Creamy Cajun Spice Pasta is simple, flavourful and ready in under 30 minutes! Made with bell peppers, mushrooms and pasta with Cajun Seasoning is an easy soulful meal! 

It’s creamy, cheesy and loaded with rustic Cajun spice!

This pasta dish has a creamy cajun sauce that coats every bite you have. It makes for the perfect weekend binge. The flavour combination is just perfect! You can have a restaurant quality dish at home, in your pyjamas and binge watch a TV series with your family! 

Creamy Cajun Spice Pasta has always had my heart and soul! 

My dad is always saying that he doesn’t like pasta dishes, it never stops me from making more pasta dishes. Pasta is my comfort food, it satisfies me! It warms my heart and calms my mind. Who else can relate? 

Trust me this is not your regular pasta dish, it is simply more than that! If my dad, who doesn’t like pasta enjoyed this dish, then definitely it is not your regular pasta dish. It is loaded with fresh and colourful vegetables such as bell peppers and mushrooms, cream and lots of parmesan cheese and not to forget lots of Cajun seasoning! 

What is Cajun Spice?

Cajun spice is a rustic seasoning blend that originated in Louisiana, the home of Cajun cooking! Everyone tends have their own view on it, but it’s a rustic spicy blend featuring lots of paprika, cayenne, garlic powder, pepper and oregano. 

What ingredients do I need for Creamy Cajun Spice Pasta?

This easy creamy cajun pasta recipe is an easy weeknight or weekend meal and requires ingredients that are easily available in any pantry. 

  • Spaghetti 
  • Olive Oil
  • Mushrooms
  • Bell Pepper
  • Cajun Spice
  • Half and Half
  • Parmesan Cheese
  • Oregano
  • Salt and Pepper

I personally enjoy eating spaghetti, but you can use any shape of pasta you like for this recipe! Shells, linguine, penne, fettuccine, you name it! If the sauce is not thick enough, you can use cornstarch slurry to get the right consistency. 

Can Creamy Cajun Spice Pasta be made in advance?

The longer this dish sits, the better it will taste as the flavour will enhance. But keep in mind that the pasta won’t be as creamy as when you first make it as the spaghetti will absorb all the cajun spice sauce. To avoid this from happening, I suggest you make the pasta sauce ahead of time but only cook and  mix in the spaghetti when ready to serve. This will prevent the pasta from absorbing the creamy cajun spice sauce. This way the pasta will taste fresh, creamy and delicious! 

If you have any leftovers, don’t worry! Store the remaining pasta in an airtight container and refrigerate it for up to 4 days. Now your weekday meal prep is sorted! 

Serve this Creamy Cajun Spice Pasta with the Lemon Herb Grilled Chicken Salad or the Homemade Garlic Bread. 

If you have any suggestion please do leave a comment below and don’t forget to tag me on Instagram if you make this dish – SpoonfulStoriesbyIshanaPassi

Creamy Cajun Spice Spaghetti

Recipe by Ishana PassiCourse: Main Dish, VegetarianDifficulty: Easy
Servings

4

servings
Prep time

10

minutes
Cooking time

20

minutes
Total time

30

minutes

Made with bell peppers, mushrooms and pasta with Cajun Seasoning is an easy soulful meal! 

Ingredients

  • 1 packet uncooked spaghetti

  • 2 tbsp olive oil

  • 2 tbsp cajun seasoning

  • 1 red bell pepper sliced

  • 1 cup mushroom chopped

  • 3 cloves garlic minced

  • 1 1/2 cup half and half

  • 1 cup parmesan cheese grated

  • salt and pepper to taste

  • 1/2 tsp oregano

Directions

  • Cook the spaghetti according to the package instructions until it is al dente and set aside.
  • Heat olive oil in a large skillet over medium heat, add in the bell peppers and mushrooms. Sprinkle the cajun seasoning, salt, pepper and oregano. Saute for about 5 minutes or until fragrant.
  • Add the garlic and stir. Cook for 20-30 seconds until garlic becomes fragrant.
  • Add the half and half and let it come to a boil. Stir in the parmesan cheese.
  • Add the spaghetti and stir everything together.
  • Garnish with chopped parsley and serve warm.

Recipe Video

Posted on

Crispy Fried Chicken

Crsipy-Fried-Chicken-Recipe-Spoonful-Stories

Let’s walk through the pleasure of having this juicy, crispy fried chicken. Super crispy fried chicken, made with buttermilk and seasoned flour is crispy on the outside, juicy and tender on the inside. This dish is perfect for picnics, potlucks, and dinner! Who doesn’t love homemade comfort food! 

Crispy Fried Chicken is my go to recipe always. The pleasure of eating this piece of fried chicken is divine.

 Imagine a piece of chicken with a coating full of crunchy ripples. As you bring it closer you can smell the spices – onion, paprika, garlic, thyme, pepper! And once you take a bite, you can hear the crispy coating cracking and one cannot resist the flavourful crust. Your mouth will be exploding with the taste of the herbs, crunch of the crispy coating and the tenderness of the juicy chicken. 

The best part about this fried chicken is that you can make it yourself at home without stopping by at KFC! Simply coat the chicken pieces in buttermilk, beaten eggs and seasoned flour and fry them to perfection. Yes, it’s that simple! All that is needed is flour, egg, buttermilk, spices of your choice and oil for frying. You can now make this juicy, tender and crispy fried chicken all by yourself!

Tips for making Crispy Fried Chicken

Dry brine the chicken – Salting the chicken means to dry brine it first. Do this step over night in the fridge or simply 30 minutes before coating and frying the chicken. This step is essential as salting is critical for moist and flavourful chicken.It gives the chicken direct contact with the salt which helps to tenderise it and make it flavourful.  

Strong spice mixture – Mix the seasoning blend while the chicken is being salted. Don’t be scared to over do it with the spice mixture as the fat from frying is going to mellow down the spice flavour and most of it will be left behind in the coating process. You can also make the seasoned flour spice mixture and store it in airtight container for future use. 

Use egg whites, alcohol and cornstarch

1. Egg whites add structure to the batter. It helps the flour coating stick to the chicken better. If you use full eggs, the fat content of the yolk will make the crispy coating soft. 

2. Alcohol helps to create flakey layers and a crispy coating. Simply add it to the batter and it will evaporate when frying the chicken pieces in oil. Thus, you are not consuming it, you’re just simply using it to create layers and crispy crust.

3. Cornstarch is another secret ingredient that can be added to the batter. Cornstarch in the flour makes the crust crispier. 

How to serve Crispy Fried Chicken

After frying the chicken pieces, move them onto a cooling rack which is set over a lined paper towel tray. Try to avoid resting the chicken directly on the paper towel or brown paper. This definitely soaks in the excess oil, but at the same time creates steamy spots that that crispy coating gets soggy. 

Let the chicken rest and cool for at least 10 minutes before serving. This will ensure that the crust is properly set and that the excess grease is soaked. 

Serve this fried chicken recipe with Sun Dried Tomato Spaghetti and enjoy a cozy meal with your loved ones over the weekend! 

Crispy Fried Chicken

Recipe by Ishana PassiCourse: Main Dish, Non-VegetarianDifficulty: Medium
Servings

6

servings
Prep time

45

minutes
Cooking time

20

minutes
Total time

1

hour 

10

minutes

Super crispy fried chicken, made with buttermilk and seasoned flour is crispy on the outside, juicy and tender on the inside

Ingredients

  • 2 large egg whites

  • 2 cups buttermilk

  • 1 tbsp vodka

  • oil for deep frying

  • 1 tbsp cornstarch

  • 2 cups flour

  • 1 tsp oregano

  • 1 tsp dried thyme

  • 1/2 tbsp freshly ground black pepper

  • 1 tbsp garlic powder

  • 1 tbsp ginger powder

  • 1 tbsp onion powder

  • 2 tbsp paprika

  • 2 tbsp salt

  • 1/2 tbsp red chilli powder

  • 1/2 tbsp coriander powder

  • 8 pieces bone chicken, 4 thighs and 4 drumsticks

Directions

  • Place the chicken pieces in a tray or plate and drizzle 1 tbsp of salt. Set aside for 30 mins or refridgrate over night.
  • In a large combine all of the spices together.
  • Coat the chicken with half of the seasoning mixture.
  • Add the flour and cornstarch to the spice mixture. Mix together and set aside. In a separate bowl whisk together the buttermilk, egg whites and the alcohol. Place a cooling rack over a lined paper towel tray.
  • One piece at a time, dip the chicken in the buttermilk to fully coat, then place it in the flour and spice mixture. Completely coat the chicken in the flour and repeat this process twice with each piece.
  • Set the chicken aside and start heating the oil for frying. Once the oil is hot enough, place 3 pieces in the oil and fry (depending on the size of the pan). Keep rotating the chicken using tongs every 3-5 minutes.
  • Until golden brown and fully cooked keep frying. It should take about 12-15 minutes per piece.
  • Transfer the chicken onto the prepared cooling rack and allow it to rest for 10 minutes before serving.
Posted on

Sun Dried Tomato Spaghetti

Sun-Dried-Tomato-Spaghetti-Recipe-Spoonful-Stories.

Who doesn’t love an easy and yet delicious weeknight dinner! If you’re a lover of simple pasta, then you will love this recipe for Sun Dried Tomato Spaghetti. Tender spaghetti, fresh basil, bits of sun dried tomato and the richness of the parmesan, all the goodness in one dish!

This recipe makes for an easy, quick and delicious weeknight meal. It is flavourful, savoury, fresh, simple and satisfying. Also, it makes a perfect summer easy dish for the hot weather when you’re craving light and refreshing dishes. 

Sun Dried Tomato Spaghetti Ingredients 

Very few ingredients are needed for this spaghetti recipe. Handful of fresh basil leaves, few cloves of garlic, jarred sun dried tomatoes in oil, freshly grated parmesan, diced tomatoes, olive oil and dry spaghetti. Feel free to add vegetables or chunks of cooked chicken if you want to make it a full meal. This is the easiest pasta recipe out there.

The sweetness of the sun dried tomatoes and freshness of the basil leaves is exactly what you would like on a hot summer evening. This is an easy dinner recipe which is amazingly delicious and can be served as a complete meal or nicely pair it with a bowl of Green Pea and Peanut Quinoa or Homemade Garlic Bread.

Eat this Sun Dried Tomato Spaghetti warm, cold or lukewarm – it still tastes amazing. That is why it makes for an easy yet tasty summer dinner recipe. 

For everyone who is gluten free and vegan, don’t worry you too can enjoy this recipe with a few variations. Simply use gluten free pasta and vegan parmesan. In just a few minutes you have a vegan and gluten free pasta ready! 

How to prevent spaghetti from sticking together 

If the noodles aren’t cooked correctly they can get quite sticky. But that won’t happen anymore if you follow the steps i’ve mentioned below. 

  • Make sure water is boiling – Before adding the spaghetti to the pot of water, make sure it is boiling. If you add the dry spaghetti to the pot of water which is not truly boiling then they would simply sit there in not hot enough water. This would make the spaghetti soggy and clumpy. 
  • Stir the spaghetti – As the spaghetti is coated with a sticky layer of starch, it is essential you stir them in the first two minutes of dumping them in boiling water. If you don’t stir them, the spaghetti will stick together and will remain stuck. 
  • Add salt to the water – Adding salt to the boiling water prevents the spaghetti from sticking together and also enhances the flavour. The salt has contact with the surface of the pasta and prevents it from getting slimy while being cooked. The salt roughs up the surface of the spaghetti. This is essential for dried pasta. 
  • Adding oil to the water – Many people believe this step prevents the spaghetti from sticking. But if you use plenty of water and keep stirring it, you wouldn’t need oil. Adding oil to the water will make the spaghetti slippery and the sauce will  not adhere to the spaghetti. Even adding oil to cooked spaghetti will have the same effect. The sauce will simply slide off. Simply toss the pasta in a bit of sauce immediately after cooking to prevent it from sticking. 

If you try this recipe, let me know what you think by leaving a comment below. And don’t forget to take a picture and tag me on Facebook / Instagram SpoonfulStoriesbyIshanaPassi so we can be pasta pals! 

Sun Dried Tomato Spaghetti

Recipe by Ishana PassiCourse: UncategorizedDifficulty: Easy
Servings

4

servings
Prep time

15

minutes
Cooking time

10

minutes
Total time

25

minutes

This recipe makes for an easy, quick and delicious weeknight meal. It is flavourful, savoury, fresh, simple and satisfying.

Ingredients

  • 1 packet dry spaghetti or gluten free pasta

  • 1 tbsp olive oil

  • 2 cloves garlic, crushed

  • 1/2 cup jarred sun dried tomatoes, sliced

  • 1 tbsp oil of jarred sun dried tomatoes

  • 1/2 cup freshly chopped basil leaves

  • 1/2 cup grated parmesan or vegan parmesan

  • 1/2 cup boiled vegetables or shredded chicken

  • Salt and pepper to taste

  • 1/2 tsp red pepper flakes

  • 1/2 tsp oregano

  • 1/2 cup diced tomatoes

Directions

  • Cook the spaghetti in a large pot of salted boiling water until tender but still firm to bite. Keep stirring occasionally. Drain the spaghetti, reserving 1 cup of the liquid.
  • Heat olive oil in a large pan, add the garlic and sliced sun dried tomatoes. Saute for 5 minutes over medium heat and add the diced tomatoes. Add the salt, pepper, oregano and red pepper flakes.
  • Bring to a boil and reduce it to medium heat. Simmer for 10 minutes or until thickened and fragrant. Stir in the basil. Adjust the consistency of the sauce according to your prefernce by adding in the pasta cooking liquid.
  • Add pasta to the sauce along with the vegetables or chicken if using. Toss together until fully combined.
  • Add the grated parmesan and drizzle the sun dried tomato oil on top. Serve hot.
Posted on

15 Minute Spicy Thai Peanut Noodles

15-Minute-Spicy-Thai-Noodles-recipe-spoonful-stories

Craving Thai food? No time to cook? This 15 Minute Spicy Thai Peanut Noodles recipe is just the right pick for you! Packed with delicious flavour, vegan, gluten free and super easy to whip up! 

This recipe is perfect if you are having a lazy and dull day. They make for the perfect comfort food and are ready under 15 minutes. 

These Peanut Noodles taste amazing. They are sweet, spicy, tangy and crunchy! Smothered in the most luscious peanut sauce, they will be gobbled up within minutes! I made these noodles experimenting with a few different ingredients, but they turned out amazingly delicious that I had to share it with all of you! I assure you that these spicy peanut noodles will be gobbled up within minutes, because my siblings definitely did so! 

There is no exact way of making these 15 Minute Spicy Thai Peanut Noodles. Like I said I was simply experimenting with a few different ingredients and just followed my gut instinct and the result was mouth watering. But this is the best part about dishes like this, you can adjust them according to your taste buds. 

How To Make The Thai Peanut Sauce

Ingredients-peanut-noodles-spoonful-stories

This Thai Peanut Sauce is easy to make and can be used as a salad dressing, meat marinade or simply as a dipping sauce. It is ready within minutes and the best part is it only requires ingredients which are easily available in your pantry. 

Simply start by sautéing the minced garlic in 1 tbsp oil. You can use any oil here, even avocado or coconut oil will work well. Sauté over low heat until the garlic is golden brown. Add in the remaining ingredients except the noodles and whisk together until fully incorporated. Bring to a boil and adjust the consistency of the sauce however you like it  by adding in water. 

Once the sauce is ready, add half of it to the cooked noodles and mix together. I suggest don’t add all of the sauce all at once, as it may be too much and can also get too salty. Start by adding half of the Thai peanut sauce and then add more according to your taste buds. 

You can serve this dish hot or cold as you prefer or also add veggies like tofu, carrots, cabbage, bell pepper, green beans or chicken and tofu. Serve it as a side dish when having a Thai meal or simply have it as a main dish. I personally like it the most with grilled chicken on the side.  

Tips and Tricks for Spicy Thai Peanut Noodles 

  • Any noodle or pasta works well for this recipe. But to make the recipe vegan or if you have an egg allergy, use rice noodles. 
  • Spicy Thai Peanut Noodles can be eaten hot or cold. Make this recipe a stir fry by adding in some vegetables. Or simply make it a salad by serving it cold along with some freshly cut vegetables. To make it an easy weeknight meal serve the noodles with grilled chicken or fish.
  • The Peanut Thai Sauce can get very salty, so be careful! Try using unsalted peanut butter if available and low sodium soy sauce as this would control the salt levels. 
  • The noodles can be stored for up to 5 days in an airtight container in the fridge. The sauce will dry up a little, but don’t worry you can fix this by adding a splash of water, broth or soy sauce in the pan and heat until warm. 

Pair this recipe with the Asian Kale Salad or the Thai Cucumber Salad for the perfect Thai meal! Lastly, if you make this recipe don’t forget to tag me on instagram and leave a comment below! 

15 Minute Spicy Thai Peanut Noodles

Recipe by Ishana PassiCourse: Main Dish, Non-Vegetarian, Side DishDifficulty: Easy
Servings

4

servings
Prep time

15

minutes
Cooking time

12

minutes
Total time

27

minutes

These Peanut Noodles taste amazing. They are sweet, spicy, tangy and crunchy! Smothered in the most luscious peanut sauce, they will be gobbled up within minutes!

Ingredients

  • 1 packet rice/normal noodles

  • 1 tbsp oil

  • 1 tbsp sesame oil

  • 1 tsp ginger garlic paste

  • 2/3 cup peanut butter

  • 3 tbsp soy sauce

  • 1/4 cup water or chicken/vegetable broth

  • 1 tbsp vinegar

  • 1 tbsp honey

  • 2 tbsp sriracha

  • 1/2 tsp red chilli flakes

Directions

  • In a large pot, bring water to boil and cook the noodles as per the instructions on the packet.
  • In a pan saute the ginger garlic paste in 1 tbsp oil over low heat until golden brown.
  • Add the remaining ingredients except the noodles and whisk together well. Add water to adjust the consistency as per your preference and bring to a boil.
  • Add 1/2 of the peanut sauce to the cooked noodles and mix together. Do not add all of the sauce at once as it can get too salty. Start by adding half and keep adding more as per your taste buds.
  • Serve with crushed peanuts, chopped coriander or red chilli flakes.
Posted on

Green Pea and Peanut Quinoa

How-to-make-pea-and-peanut-qunioa-spoonful-stories

Ever since I was a baby, I have always been fussy about eating green peas. I only started enjoying green peas when I decided to combine it with quinoa. This green pea and peanut quinoa recipe will be every picky eater’s favourite dish! 

Quick and easy, this dish is flavourful and a bowl of healthy comfort food! This quinoa recipe can be served cold as well as warm. It is more like a green pea salad if served cold. It makes for a delicious and healthy side dish or even a healthy summer dinner recipe that goes with anything. 

Every time I cook with green peas it makes me think of my dad. With him its green peas over any other vegetable! This actually reminds me of Nigella Lawson. She absolutely loves green peas! In Fact most of her renowned savoury recipes are to do with peas. 

The best part about peas is that they are a nutritional powerhouse despite the sweetness they have. This green pea and peanut quinoa recipe is fluffy, tasty and high in protein. Quinoa being complete protein and when peas are paired with it, it’s added protein. Quinoa also provides you with lots of minerals and healthy fats making it an easy healthy recipe.

It not only serves as a great side dish but also perfect to pack as a lunch box! 

Fresh or frozen peas?

As peas are not available all year round, it’s okay to use frozen peas for this recipe. This recipe works great with fresh or frozen peas, use whatever is available. Majority of the time I have made the recipe with frozen peas and the taste is the same. So it doesn’t really make a difference. This is also an added advantage. You can make this dish as a quick fix if you want to put together something at the last minute. 

This green pea and peanut quinoa recipe has an Indian touch to it. It is sautéed in olive oil, curry leaves and black mustard seeds to give it a taste of those flavours. I have adapted this recipe from the famous Indian dish, Poha (flattened rice). Poha is a Western Indian breakfast recipe but its flavours are known all over the country. It has been a tradition in my family since many years to have Poha for breakfast every Sunday morning. 

This recipe is a one pot recipe.

One pot quinoa and fresh peas

Start by boiling the peas in a medium sized pot. Once the peas turn bright green and slightly soft, rinse them under cold water. Keep them aside. Next boil your quinoa in the same put in chicken or vegetable stock. You can also boil it in simple water. When the quinoa is cooked and all the liquid in the pot is absorbed, turn off the heat. Allow the quinoa to rest for 5-8 minutes. 

Fluff the quinoa with a fork and mix it with the peas. 

How-to-make-pea-and-peanut-qunioa-spoonful-stories

Sauté the pea and quinoa mixture in olive oil, mustard seeds and curry leaves. Cook until the quinoa is fragrant and add a handful of peanuts. Serve hot and garnish with chopped parsley if you want. This dish is sure to make you feel happy and satisfied! 

Green Pea and Peanut Quinoa

Recipe by Ishana PassiCourse: Sides, MainDifficulty: Easy
Servings

4

servings
Prep time

10

minutes
Cooking time

25

minutes
Total time

35

minutes

Quick and easy, this dish is flavourful and a bowl of healthy comfort food!

Ingredients

  • 1/2 cup uncooked quinoa

  • 1 cup raw green peas

  • 1 cup vegetable stock

  • 1 tsp black mustard seeds

  • Handful of fresh curry leaves

  • 1 tbsp olive oil

  • Handful of peanuts

Directions

  • In a medium size pot, boil the green peas until bright green and slightly soft. Rinse them under cold water, drain and keep aside.
  • In the same pot, bring to boil the vegetable stock. Add the quinoa, cover and let it cook on low heat. Keep it on low heat until all the liquid is absorbed by the quinoa and is fully cooked. Remove from the heat and allow it to rest for 5 minutes.
  • Fluff the quinoa with a fork and mix it with the green peas.
  • In a medium size pan, heat the olive oil. Add the black mustard seeds and curry leaves. After a few seconds, add the quinoa and peas mixture and the peanuts and sauté for 1-2 minutes. Cook until the quinoa is fragrant.
  • Remove from heat and serve hot.

Make sure to try the Greek Watermelon and Cottage Cheese Salad!