Posted on

No – Bake Eggless Chocolate Tart

no-bake-eggless-chocolate-tart.

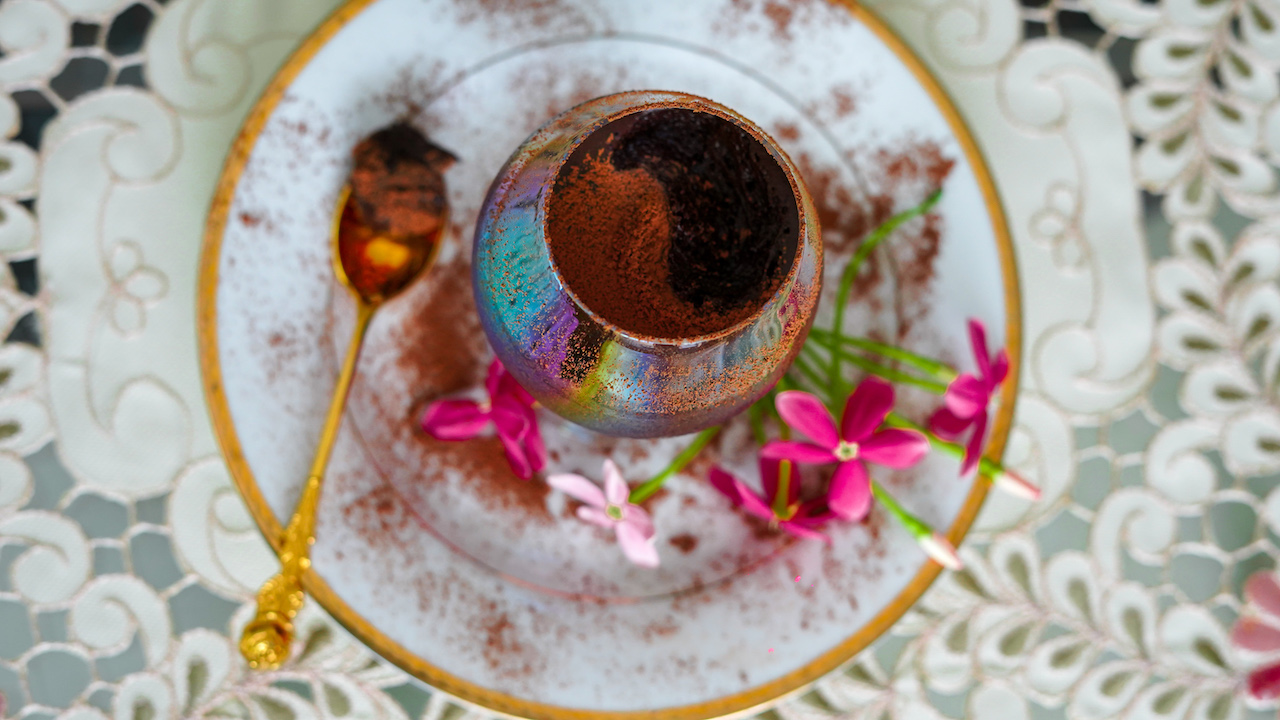
The weekend is upon us and I cannot resist making a dessert anymore! This No – Bake Eggless Chocolate Tart is the perfect recipe for the weekend! It is rich, decadent, delicious and super easy to make!

This recipe consists of a few simple steps and can be made within a few hours. So I absolutely see no reason for you to refrain from making this tart.

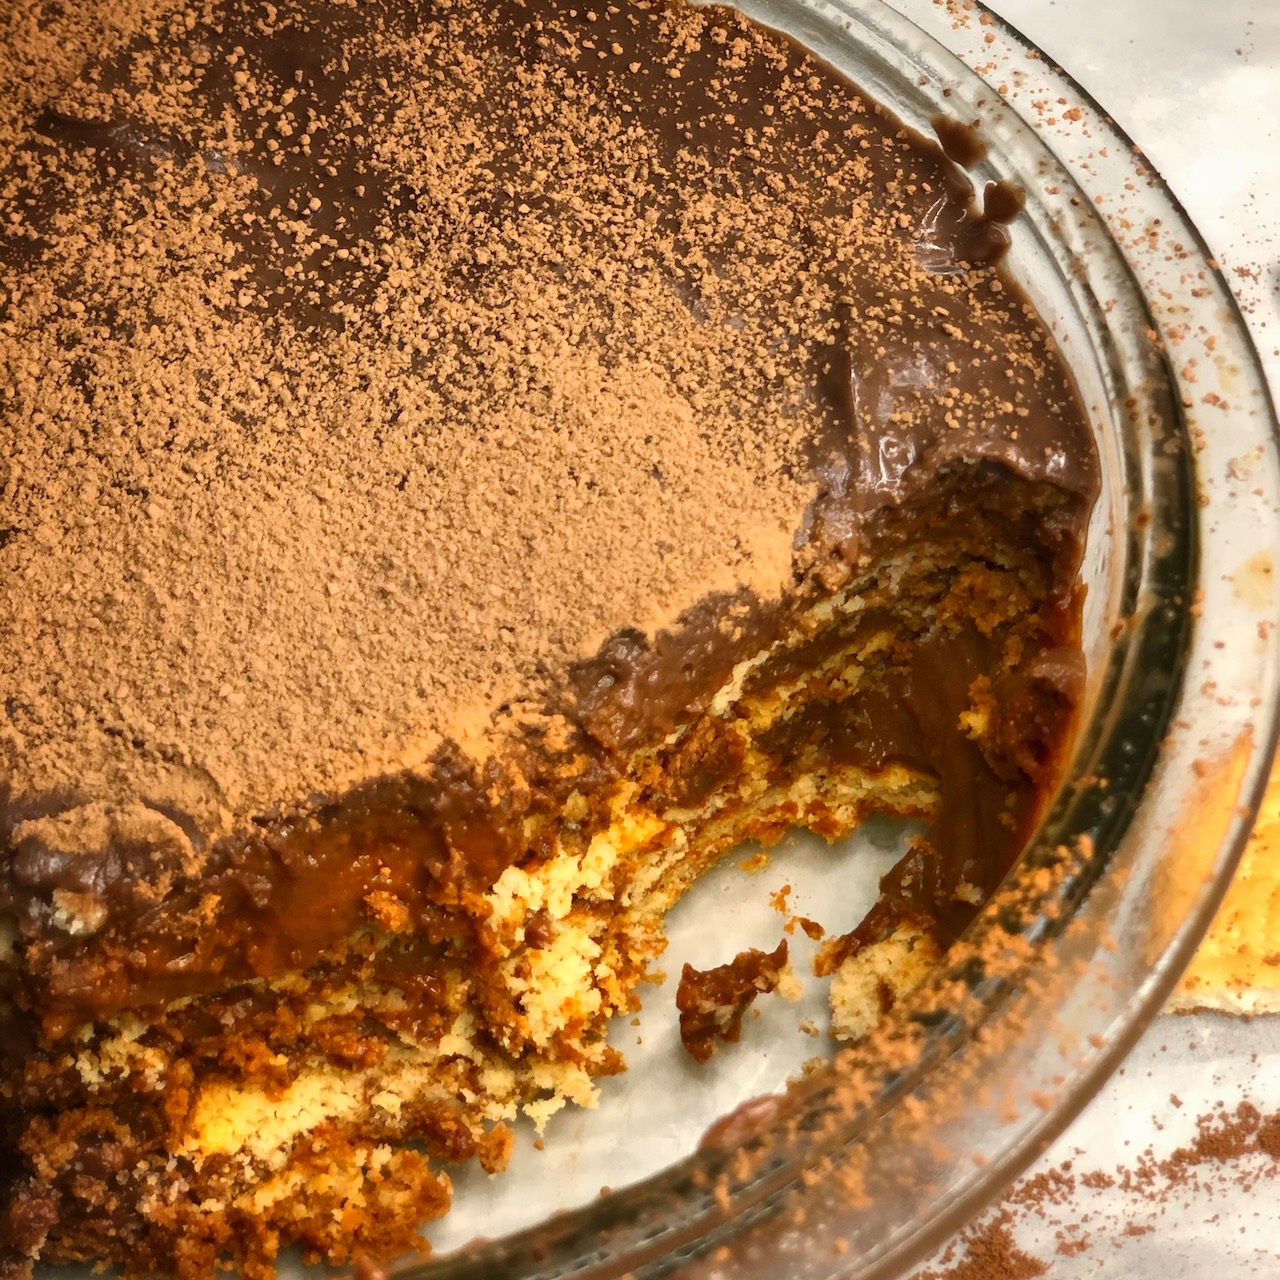
A buttery crust, with a delicious and sinful chocolate filing – set to perfection in the refrigerator is all that you need on a weekend! 

The texture of this No – Bake Eggless Chocolate Tart is between cheesecake and firm mousse. It is creamy, rich and chocolatey! Chocolate is one flavour that you can never go wrong with. It is loved by everyone!

The crust of this tart is a no – bake, rich, buttery and biscuit crust. The crust is easy to work with and goes perfectly well with the rich chocolate filling. But if you truly love chocolate desserts, make sure to try the Rich Chocolate Cake with Coffee Buttercream Frosting! 

No – Bake Eggless Chocolate Tart Crust

No-bake-chocolate-tart-crust-spoonfulstories

The crust for the chocolate tart is a buttery and biscuit no bake tart. All that you need for this crust are two ingredients, crushed digestive biscuits and salted butter. To make the crust, crush the digestive biscuits in a food processor or by hand. I usually prefer doing it by hand because I like the texture of big chunks. But if they biscuit chunks are too big, the tart wont hold together. Once the biscuits are crushed, mix it with melted butter. You can use your hands to mix it well until all the crumbs are well coated. This mixture will be our crust! The melted butter is what will hold the crust together. So it is important to have patience at this step. If the melted butter doesn’t have enough time to set, the tart shell will not hold together! 

Tips for the Chocolate Tart

A tart is the most delicious, easy and versatile dish. It can be prepared in no time with very few ingredients. A tart shell can be used for sweet and savoury fillings both. From chocolate ganache, lemon curd, cream cheese or simply fresh fruit! So here are a few tips and tricks to make the perfect tart shell!

choclate-tart-recipe-spoonful-stories
  1. For the chocolate filling, cornflour is the ingredient that will make the filling smooth and silky and most importantly stable and thick! It is the thickening agent that we are using, but you can substitute it with custard powder. 
  2. Make sure to spread the biscuit mixture evenly in the tart tin while you make the crust. Use your fingers to gently even it out. If the crust is not even, you will have a haphazard and uneven crust which can easily break. 
  3. The crust is required to be set in the refrigerator for a minimum 30 minutes. This is the key to a perfectly strong tart shell.
  4. I have used dark chocolate for the chocolate filling. But you can also use milk chocolate.
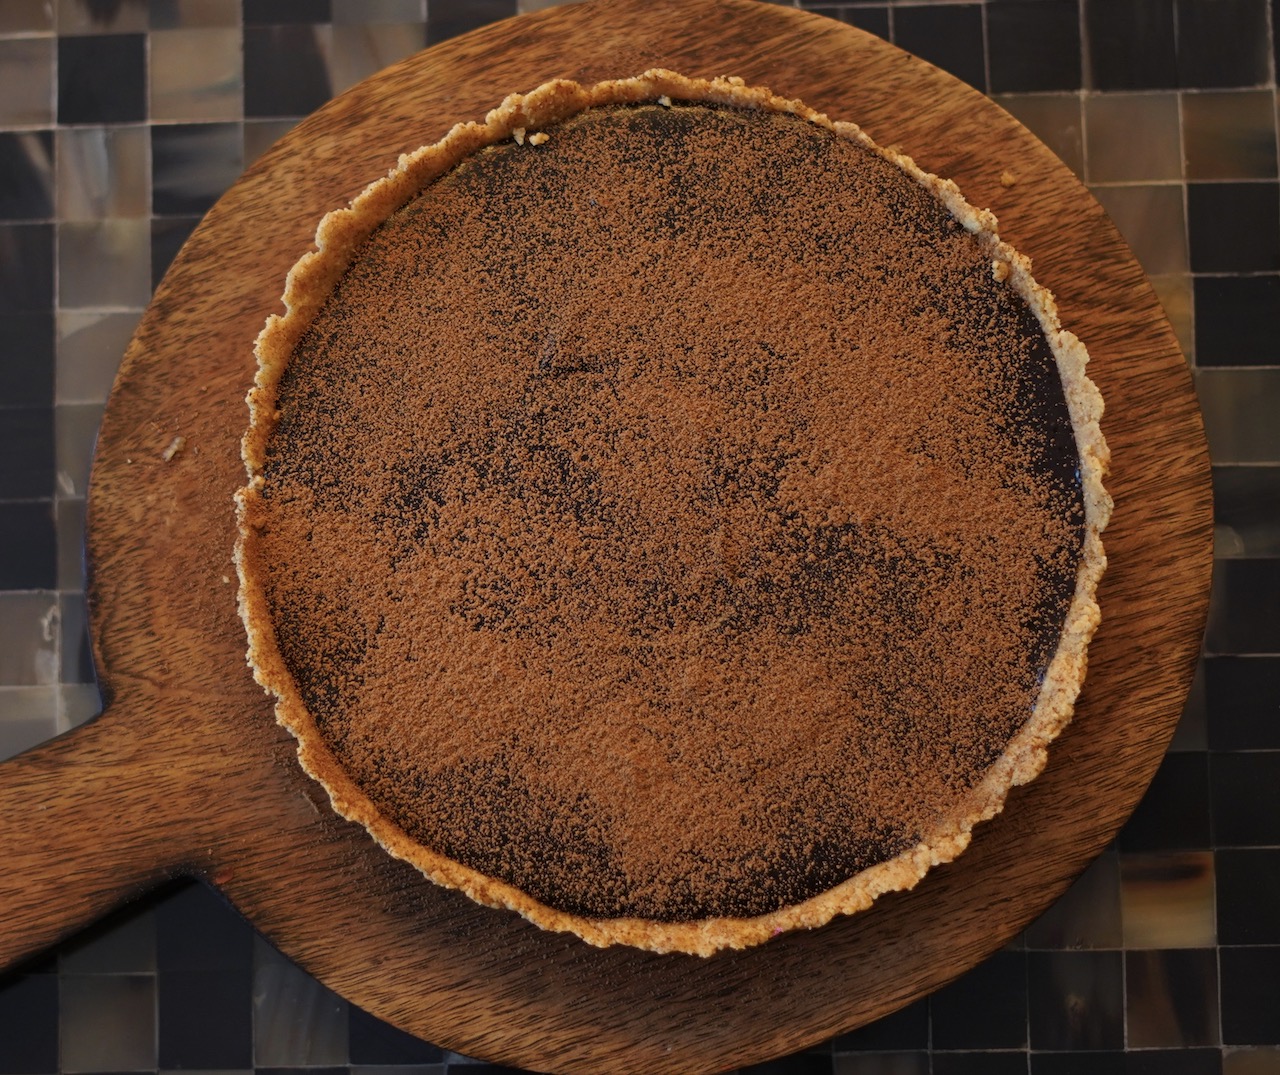
  5. I have garnished the tart by dusting cocoa powder on top. You can also decorate the tart with freshly cut seasonal fruits, chocolate shavings or meringue. 

If you try this tart, do tag me on Instagram!

No – Bake Eggless Chocolate Tart

Recipe by Ishana PassiCourse: DessertsDifficulty: Easy
Servings

8

servings
Prep time

30

minutes
Cooking time

2

hours 
Total time

2

hours 

30

minutes

No – Bake Eggless Chocolate Tart is the perfect recipe for the weekend! It is rich, decadent, delicious and super easy to make!

Ingredients

  • 2 cups crushed digestive biscuits

  • 3/4 cup salted butter, melted

  • Chocolate Filling
  • 4 tbsp cornflour or custard powder

  • 1 cup melted chocolate

  • 1 tsp coffee powder

  • 2 cups + 4 tbsp fresh cream

Directions

  • Crush the digestive biscuits in a food processor or using your hands. Combine the crushed biscuits and melted butter in a bowl until a ball is formed. Make sure the it stays between your fists and does not crumble.
  • Evenly spread this mixture into a 9 inch tart tin and set it in the fridge for 30-45 minutes.
  • In a saucepan over medium heat, heat 2 cups of cream. Do not boil.
  • In the meantime, mix the cornflour with the remaining 4 tbsp cream. Make a paste and keep aside.
  • Add the coffee powder and the melted chocolate into the cream. Mix it well.
  • Once combined, add in the cornflour paste. Keep stirring until thick to avoid lumps.
  • Once sufficiently thick, pour this mixture into the tart tin and set it in fridge for 2 hours.
Posted on

Strawberry Rolls with Cream Cheese Icing

how-to-make-strawberry-rolls-spoonful-stories

Strawberry Rolls with Cream Cheese Icing are delicious sweet rolls with scrumptious strawberry jam and rich cream cheese icing. These Strawberry Rolls with Cream Cheese Icing make for a perfect weekend breakfast or brunch! 

These delicious sweet Strawberry Rolls with Cream Cheese Icing are dreamy rolls that are paired perfectly with a hot cup of coffee to make your breakfast scrumptious and sweet! 

Can you imagine a cinnamon roll with a strawberry glaze and strawberry jam on the inside when you take a bite? Life cannot get better than this! Oh wait, it does! How can one forget the rich cream cream cheese icing drizzled all over the rolls. The cream cheese icing takes the strawberry rolls to the next level, making it the perfect glaze for these delicious Rolls. 

Strawberry Rolls are filled with strawberry reduction and fresh strawberries. Roll them up, cut them and let them rise until doubled in size. Bake them and drizzle the rolls with cream cheese icing while still warm for the most delicious Strawberry Rolls!

Why Strawberry Rolls?

I have been wanting to make these Strawberry Rolls for a very long time now. But as fresh strawberries were not available I thought of making them later when I can get hold of fresh berries. But one day a friend of mine messaged me asking, if I would like to try a few dishes using frozen berries? Trust me the berries she sent were truly out of this world! They were not only as good as fresh berries but even better! Sweet, juicy and not only tasted delicious they even had the smell of fresh juicy berries to them! If you are missing fresh berries just like me, don’t worry! Simply contact them uvberries and fulfil your craving of fresh hand picked berries!

So today was the perfect day to make these rolls. I love cinnamon rolls, but wanted to give them a summery twist. So I decided to make Strawberry Rolls. 

Ingredients in Strawberry Rolls with Cream Cheese Icing

The detailed instructions and measured ingredients are in the recipe card below at the bottom of the page. 

strawberry-rolls-recipe-spoonful-stories

For the dough you will need 

  • Dry Ingredients – flour, salt and sugar
  • Wet Ingredients – milk, butter and egg
  • Yeast – I have used instant yeast, but you can also use dry active yeast. But keep in mind that it needs to be activated. 

For the filling you will need

  • Berries – freshly cut strawberries
  • Jam – I have used freshly made strawberry jam, to make sure the flavour is carried through. 

For the cream cheese icing you will need

  • Cream Cheese – Make sure the cheese is at room temperature. My favourite brand to use is Philadelphia Cream Cheese but you can also use low fat cream cheese.
  • Sugar – Best to use powdered sugar as it will assure you a smooth texture instead of a grainy texture. 
  • Butter – We have to use unsalted butter to control the salt content in the recipe. 

Tip for making the best rolls

  • Make sure the milk is not too hot, else it could kill the yeast.
  • Always check the expiration date of the yeast.
  • If you do not have a warm place for the dough to rise, Heat your oven to 180 C degrees for 5 minutes then turn it off and place the rolls inside.
  • Don’t put too much jam inside as it will leak out from the sides. 

If you like this recipe and are looking for more breakfast or weekend brunch recipes, try the Nutella Cinnamon French Toast Rolls and the Best Fluffy Pancakes!

Strawberry Rolls with Cream Cheese Icing

Recipe by Ishana PassiCourse: Baking, Breakfast, DessertsDifficulty: Medium
Servings

6

servings
Prep time

30

minutes
Cooking time

40

minutes
Total time

1

hour 

10

minutes

Strawberry Rolls with Cream Cheese Icing are delicious sweet rolls with scrumptious strawberry jam and rich cream cheese icing. These Strawberry Rolls with Cream Cheese Icing make for a perfect weekend breakfast or brunch! 

Ingredients

  • Dough
  • 1/2 cup milk

  • 1 egg

  • 1/4 cup butter

  • 1/4 cup granulated sugar

  • 2 cups flour

  • 1/4 tsp salt

  • Filling
  • 1 cup fresh strawberries

  • 3/4 cup strawberry jam

  • Cream Cheese Icing
  • 1/2 cup cream cheese

  • 1 tsp vanilla essence

  • 2 tbsp butter

  • 1 cup powdered sugar

  • Strawberry jam
  • 2 cups strawberry

  • juice of 1 lemon

  • 1/2 cup powdered sugar

Directions

  • To activate the yeast, warm the milk in the mircowave for 30 seconds. Add yeast to it, stir it and let it rest for 5 minutes.
  • In a large bowl mix the flour, egg, sugar, butter and the yeast and milk mixture and knead it into a dough. The dough should be soft and elastic. Place the dough in a large slightly oiled bowl, cover it with plastic wrap and let it rise in a warm place until double in size. About 1-2 hours.
  • In the mean time make the strawberry jam. For the jam, heat a nonstick pan and add all the jam ingredients in to it. Bring to a boil and let it simmer for about 30 minutes or until of the desired consistency. You can also use ready made jam.
  • Butter a 10 inch baking dish and preheat the oven at 180 C degrees.
  • Roll the dough into a rectangle about 18×12 inches and spread the jam all across it. Make sure you dont use too much otherwise it will leak from the sides. Evenly arrange the freshly cut strawberries over this.
  • Start rolling the dough gently and when you reach the end make sure you pinch the sides together.
  • Cut the roll into 6 equal rolls and place the rolls in the baking dish and bake until golden brown and cooked.
  • In the meantime you can make the cream cheese icing. In a large blender add all the ingredients for the icing and blend it together. If the icing is too thick add a little milk until the desired consistency is achieved. You shouldnt need more than 1-2tbsp milk.
  • Once the rolls are ready, let them cool for 10 minutes then drizzle with cream cheese icing and serve!
Posted on

Cinnamon Cake

Cinnamon-Cake-Recipe-Spoonful-Stories.

A Cinnamon Cake that is simple, fast, and delicious! This Cinnamon Cake recipe is light and flavourful and makes for the perfect anytime cake, from breakfast to snack or dessert! 

This tea time cake is prepared in a bundt tin for a beautiful presentation and covered in cinnamon and sugar glaze. 

I’m so excited to share this tea cake recipe with all of you today! It’s really easy to make but looks like that you’ve put in hours of hard work in the kitchen.

The crust is sweet, crumbly and buttery with a crisp sugar and cinnamon glaze. 

I truly love cinnamon….specially the smell of it! It’s one of my favourite smells! 

Recently I’m becoming more and more obsessed with easy bakes. Specially easy bakes that are decadent and delicious! Most of my popular recipes are ALWAYS those which are easy to make and can be recreated every time without any flaws.  

That’s the reason my Chocolate Chip Banana Bread is the most popular recipe on my website.

I know how it is for all of you, I completely understand, most of the time we need foolproof bakes that can be whipped up easily or even last minute when we have unexpected guests. But at the same time I do like to create challenging recipes too that are more extravagant. 

So why is this Cinnamon Cake so special? 

Despite the recipe being easy, it is actually one of my most favourite cakes. Even though the cake has no frosting, it still has the sugary cinnamon crust which will make you want more every time you have it. After this cake is baked, pour the sugar cinnamon glaze on top and let the cake soak it all up. 

You’ll surely be reminded of having a warm cinnamon donut! 

Tips for making the perfect Cinnamon Cake

  • Make sure the butter is at room temperature. You don’t want the butter to be fridge cold nor melty. Ideally take it out of the fridge 15 minutes before starting the process.
  • The first process for this tea cake recipe is to beat the butter and sugar together. This process is known as creaming. When you beat the sugar and butter together, eventually the texture of the mixture will change and it’ll be creamy and pale. This is exactly the texture you need. Creaming the butter and sugar together till it reaches a creamy and pale texture will help in achieving a light and fluffy cake. 
  • Next are the eggs! Majority of the time when eggs are added to the batter, the batter turns lumpy and looks curdled. But this is nothing to worry about, it is completely normal.
  • When it comes to mixing in the dry ingredients, remember to gently fold in the dry ingredients using the cut and fold method. This process is important as it will prevent you from ruining the air incorporated in the batter. 
  • Once the cake is ready, pour the sugar and cinnamon glaze generously all over it and let the cake soak up all the syrup. The cake is best served warm. You can also serve with custard or fresh berries!

If you make this Cinnamon Cake recipe, don’t forget to tag me SpoonfulStoriesbyIshanaPassi

Cinnamon Cake

Recipe by Ishana PassiCourse: Baking, DessertsDifficulty: Medium
Servings

8

servings
Prep time

20

minutes
Cooking time

50

minutes
Total time

1

hour 

10

minutes

This tea time cake is prepared in a bundt tin for a beautiful presentation and covered in cinnamon and sugar glaze. 

Ingredients

  • 2 cups flour

  • 1 tbsp baking powder

  • 1 1/2 tbsp cinnamon powder

  • 1 1/3 cups granulated brown sugar

  • 2/3 cup butter, softened

  • 1 tsp vanilla essence

  • 3 eggs

  • 2/3 cup milk

  • Sugar Cinnamon Glaze
  • 1/3 cup granulated sugar

  • 1/3 cup water

  • 4 tbsp unsalted butter

  • 1 tsp vanilla essence

  • 1 tsp cinnamon powder

Directions

  • Grease and line a bundt pan and preheat the oven to 200 degrees C.
  • In a large bowl sieve together the flour, baking powder and cinnamon powder and keep aside.
  • In a separate bowl cream together the butter and sugar until light and fluffy. Add the vanilla essence and one egg at a time. Beat until fully incorporated.
  • Add the milk and half of the dry ingredients. Gently fold in using a spatula. Now add the remaining of the dry ingredients.
  • Pour the batter in the prepared pan. Bake for 50-55 minutes at 180 degrees C or until the tester comes out clean.
  • Once the cake is out of the oven and cooling. In a small sauce pan on medium heat combine all the ingredients for the glaze. Keep stirring over medium heat until sugar is dissolved and the syrup is glaze thickened.
  • Turn the cake on to a cooling rack. Make small holes using a toothpick and pour the glaze all over the cake.
  • Slice, serve and enjoy! The cake is best served warm.
Posted on

Homemade Mango Ice Cream

Mango-Ice-Cream-recipe-Spoonful-Stories.

All you need is 3 ingredients to make this Homemade Mango Ice Cream an absolute hit this summer season! This easy homemade ice cream is sweet and creamy, and the taste of mango will leave you wanting for more. This really is a creamy ice cream made without an ice cream machine!

The Homemade Mango Ice Cream recipe is dedicated to all of you, like me, who have been disappointed before by the efforts to make homemade ice cream. That is, without an ice cream maker! 

The traditional way of making ice cream is by making a sweet mixture of eggs and cream. The mixture is then churned in the ice cream machine as the ice cream gradually freezes. There are two benefits of churning; it helps in aerating the mixture to make it light and fluffy and it prevents the icicles from forming which makes the ice cream creamy rather than icy. 

The problem with no churn, milk ice cream is that they freeze into solid blocks of ice. And if you leave them out to soften for a few minutes they melt into a liquid. 

How to make the ice cream creamy?

Two simple ingredients are needed – condensed milk and cream! Condensed milk is the ingredient that keeps the creamy texture in the mixture. Milk can also be used, but once frozen and if you have missed the perfect window to scoop it out, then it’s a frozen block of solid ice! And if you leave it out to soften, it turns into a puddle of liquid. The whipped cream helps to aerate the mixture which makes the ice cream light and fluffy. 

Simply whip the cream, fold through the condensed milk and the reduced mango puree.

Why should I simmer and reduce  the mango puree? 

Simply pureeing the mangoes and plonking it to the mixture would make the ice cream icy instead of icy. It wouldn’t make the whole mango ice cream icy, but there will still be small tiny icy bits when you eat it.

So, to avoid this, reduce the mango puree by simmering it on the stove. Not only will this prevent the icy bits from forming but you will also be able to use more mango puree and enhanced the mango flavour in the puree. 

How does it compare to store bought tubs?

This Homemade Mango Ice Cream is something you definitely can’t buy at a store! It has real mango flavour and mango chunks! No artificial colouring or flavours in sight. Mango lovers, this is a dream come true!

The ice cream takes 12-16 hours to freeze and just a few minutes to soften before you get that heavenly scoop of mango ice cream. The ice cream is really scoop-able! After 24 hours, it freezes more firmly, leave it out for 5 minutes and it’ll soften to become scoop-able without melting. 

Don’t forget to try the Mango Panna Cotta if you’re looking for more mango recipes! 

I would love your suggestions if you try this recipe! Tag me on Instagram @spoonfulstoriesbyishanapassi

Homemade Mango Ice Cream

Recipe by Ishana PassiCourse: Desserts
Servings

10

servings
Prep time

20

minutes
Cooking time

10

minutes
Total time

30

minutes

This easy homemade ice cream is sweet and creamy, and the taste of mango will leave you wanting for more.

Ingredients

  • 3 Cups mango puree

  • 1 can condensed milk

  • 1 cup heavy cream

  • 1 cup diced mango

Directions

  • Pour the mango pure in a non stick pan over low heat. Cook stirring continuously for 10-15 minutes. When the puree is reduced by half, set aside to cool.
  • Combine the cooled mango pure and condensed milk in a bowl.
  • Using a hand mixer, whip the cream until stiff peaks are formed.
  • Fold half of the cream into the mango mixture using a spatula until mostly combined and then fold in the remaining. Lumps will appear, but keep folding through until lump free.
  • Mix in the diced mango and pour into a container. (Preferable a glass container with a lid). Otherwise any non reactive container.
  • Place a piece of parchment paper or cling film on the surface and then place the lid.
  • Freeze for 12-16 hours. Leave it out on the counter for a few minutes to soften. Scoop and serve!
Posted on

Eggless Chocolate Biscuit Pudding

Eggless-Chocolate-Pudding-Spoonful-Stories

You don’t need to be a baker to make this Eggless Chocolate Biscuit Pudding. It is simple, effortless and will surely explode your taste buds! This pudding has all the good things, layers of chocolate and biscuits dunked in coffee. 

One doesn’t always have to make elaborate desserts, some don’t require baking and this recipe is one of them. Get your family together and have heart to heart conversations over this decadent dessert. I assure you this heart warming dish will be a binding agent and will be gobbled up within minutes!

If you are new to making desserts then this is the perfect recipe to start with. This is truly the easiest dessert recipe you will ever make. It makes for the perfect party dessert. It is fancy, not many ingredients required, takes up little time to assemble and can be prepared ahead of time! 

Ingredients 

ingredients-eggless-chocolate-pudding-spoonful-stories

This no bake easy dessert recipe is the perfect quick fix for any occasion. 

All the ingredients required for this Eggless Chocolate Biscuit Pudding recipe are everyday pantry staples that we all use in our household. Milk, cornflour, sugar, coffee powder, boiled water and biscuits. I have used McVities Digestive Biscuits because they tend to soak up the coffee syrup better than other biscuits. But feel free to use any biscuits that are available in your kitchen. 

Ideal texture of a pudding 

A pudding is known to be velvety and smooth. That is why it is important to make sure that there are no lumps in your mixture while cooking the base of the pudding. 

Each spoonful of the pudding should give you a smooth, creamy and velvety texture. Even though there are many ready to eat pudding mixtures available in the market now, nothing can beat the deliciousness of the pudding you make from scratch. It involves the same time and effort and tastes much better. 

What is a biscuit pudding?

A biscuit pudding is basically a dessert which has layers of biscuits and pudding/custard. You can use any biscuit that you have or want for a biscuit pudding. Soak the biscuits in desired flavour syrup to enhance the flavour of the pudding. For this no bake dessert recipe I have soaked the digestive biscuits in a coffee syrup.

Tips for making the Eggless Chocolate Pudding

  • To get the best flavour, it is important to soak the biscuits nicely in the coffee syrup. This is what enhances the flavour of the pudding.
  • To make the chocolate pudding, you need to use a thickening agent. I have added cornflour to the milk. It is very important to mix well to make sure there are no lumps when you mix in the cornflour in the milk. 
  • While adding in the cocoa powder, it is again very important to mix it really well. Cocoa powder always creates lumps when added to a liquid. To make sure you have a smooth pudding, mix it in really well. For this I have mixed the cocoa powder in half a cup of milk and made it into the paste and then mixed it into the milk. 
  • Once the pudding is layered, allow it to rest for 6-8 hours to ensure the best flavours and look. But if you do not have much time, refrigerate it for 3 hours or until set. 
  • Before allowing the pudding to rest and cool, cover it with a cling film. Make sure it touched the surface of the pudding. This will prevent another layer being formed on top. 

If you are craving chocolate and want a no bake dessert, make sure to try the Chocolate Mousse and tag me on @spoonfulstoriesbyishanapassi

Eggless Chocolate Biscuit Pudding

Recipe by Ishana PassiCourse: DessertsDifficulty: Easy
Servings

8

servings
Prep time

15

minutes
Cooking time

3

hours 
Total time

3

hours 

15

minutes

This is truly the easiest dessert recipe you will ever make. It makes for the perfect party dessert. It is fancy, not many ingredients required, takes up little time to assemble and can be prepared ahead of time! 

Ingredients

  • 4 cups + 1 cup milk

  • 5 tbsp cornflour

  • 1/2 cup cocoa powder

  • 1/2 cup sugar, add more if you like it sweet

  • Coffee Syrup
  • 1 cup boiling water

  • 1 1/2 tbsp coffee powder

  • 1 tsp vanilla essence

  • Layering
  • 25-30 biscuits of your choice

Directions

  • In a large saucepan, heat 4 cups of milk on low heat.
  • In a bowl mix the cornflour with 1/2 cup of milk in it. Make it into a thick paste and make sure there are no lumps.
  • Add the cornflour mixture to the milk and mix well, making sure there are no lumps. Bring this mixture a boil.
  • In a separate bowl mix the cocoa powder with the remaining 1/2 cup of milk. Make sure there are no lumps and add this mixture into the saucepan. Add the sugar into the pan as well and mix well.
  • Once the chocolate and milk mixture is thick and smooth, transfer it to a bowl and set aside for it to cool.
  • Now for the coffee syrup, in a bowl mix the coffee powder, boiling water and the vanilla essence.
  • To start layering the pudding, soak the biscuits nicely in the coffee syrup and spread them all over the dish as the base of your serving dish.
  • Top the biscuit layer with the cooled chocolate pudding mixture. Then again add the layer of biscuits and repeat this process till the serving dish is full.
  • Cover with cling film and chill in fridge for 3 hours or overnight.

Recipe Video

Posted on

Mango Panna Cotta

mango-panna-cotta-spoonful-stories.

Make your next dessert a Panna Cotta and give it a mango twist this mango season! Mango Panna Cotta Recipe is rich, smooth, decadent and super easy to make! This Italian dessert is the easiest make ahead dessert recipe and is perfect for a dinner party or a family gathering. 

Everyone loves a quick and easy dessert recipe that takes only 15 minutes to prepare!

What is a Panna Cotta?

Panna Cotta is an Italian dessert that is translated as cooked heavy cream. It is made with sugar, milk, cream and gelatine. Panna Cotta cannot be made without gelatine as the cream would not set. It simply takes 15 minutes to prepare this amazingly delicious and decadent dessert and can be made ahead of time. It lasts well for a few days in the fridge. 

This easy Mango Panna Cotta is creamy, fruity and sweet. Perfect dessert for any occasion that nobody can resist! 

Panna Cotta Variations 

The flavours and variations for a Panna Cotta are endless. From a plain vanilla to a fruity flavour such as strawberry or mango or simply coffee. To give it a particular fruit flavour add the puree to the milk and cream mixture or the chopped fruit chunks. For this recipe as the mango season is in season, I have used mango chunks but you can also use mango puree instead. Some other options are blueberry, strawberry, raspberry, coffee syrup, cinnamon and cardamom. 

Why should you use mangoes?

I have used mangoes because it’s raining mangoes in our house. We have a huge mango tree in our backyard and those are the best mangoes I’ve ever eaten. They are sweet and juicy! But mangoes have a lot of added benefits too.

  1. Mangoes provide 2/3 of your daily Vitamin C, 35% of Vitamin A and 12% of fibre. 
  2. Mangoes are also cholesterol free and fat free, making them a perfect snack anytime of the day. 
  3. It also contains folate, B6, iron and a little calcium, zinc and vitamin E. 

Looking for more dessert recipes?

  1. Chocolate Mousse
  2. Lemon Drizzle Cake
  3. Easy Homemade Fudgy Chocolate Brownies

I hope you enjoy this creamy, fruity and velvety mango dessert recipe!

Mango Panna Cotta

Recipe by Ishana PassiCourse: DessertsCuisine: ItalianDifficulty: Easy
Servings

6

servings
Prep time

15

minutes
Cooking time

3

hours 
Total time

3

hours 

15

minutes

Mango Panna Cotta Recipe is rich, smooth, decadent and super easy to make! This Italian dessert is the easiest make ahead dessert recipe and is perfect for a dinner party or a family gathering. 

Ingredients

  • 300ml thickened cream

  • 150gm white chocolate

  • 1/2 cup chopped mango

  • 3/4 cup milk

  • 1 tbsp boiled water

  • 2 tsp gelatine powder

  • 2 tbsp castor sugar

Directions

  • Grease 86 cup moulds and arrange them on a baking tray. In a sauce pan, combine the milk, cream, chocolate and sugar. Stir over low heat until melted. Do not boil.
  • In a small jug whisk together the gelatine and boiling water vigorously with a fork. Until dissolved. Cool slightly and mix it into the cream mixture.
  • Pour the cream mixture in to the moulds. Evenly distribute the chopped mangoes into the moulds.
  • Cover the moulds with cling film and allow it to chill for 3 hours or overnight in the fridge.
  • To serve gently slide the panna cotta from the mould and serve immediately with chopped mangoes and crushed biscuits.

Recipe Video

Posted on

Lemon Drizzle Cake

How-to-make-lemon-loaf-cake-recipe-spoonful-stories

Longing for a lemony treat? Then this is the best Lemon Drizzle Cake recipe you can ever come cross. It’s tender, rich, dense and moist crumbs are bursting with a tangy flavour that any lemon lover would crave for! 

Ever had the Starbucks Lemon Loaf Cake? I clearly remember the day I tried the lemon loaf cake at Starbucks, it was amazingly delicious! Every time I am at Starbucks I end up ordering a slice of the lemon loaf cake for myself. I have tried attempting to make the same cake numerous times but never really got it right. Finally after many attempts, this tried and tested recipe will give you the perfect Lemon Drizzle Cake, just the way you would get at Starbucks!

This lemon cake recipe makes for a soft, springy and moist cake without it being heavy or dry. Neither is it too buttery, oily or sweet. It makes for the perfect tea cake! Also, the ingredients needed for this lemon cake are surely stocked in your pantry right now. 

How to make the Lemon Drizzle Cake?

This cake is easier to make than it even tastes! Firstly, don’t forget to preheat the oven at 180c and grease and line a loaf tin. Cream the butter and sugar until fluffy. Make sure the butter is at room temperature and softened, as it is impossible to cream frozen butter. Don’t over beat the mixture as it could split.

Cream-butter-sugar-lemon-cake-spoonful-stories

Add the eggs one at a time along with the lemon zest and beat well. The mixture might curdle, but that is nothing to worry about. 

Lemon-drizzle-cake-steps-recipe-spoonful-stories

After the eggs have incorporated well into the sugar and butter mixture, sift in the flour and baking powder into the mixture. Along with the flour, add the 4 tbsp of milk and gently fold in the mixture using a spatula. 

Lemon-drizzle-cake-steps-spoonful-stories

It is important to fold in the mixture gently as folding traps in extra air in the batter and breaks up existing air bubbles into smaller ones. Not only this, it also prevents the batter from causing any deflation. 

Once the flour is incorporated well, pour the mixture into the loaf tin and bake for 35-40 minutes or until the skewer comes out clean. 

Lemon Glaze

I have drizzled the lemon glaze on top of the loaf cake to enhance the flavour of the cake. But feel free to avoid this step if you like as it is completely optional. Glazing the cake doesn’t only enhance the flavour but also makes it look fancier. For the glaze you require, ½ cup icing sugar 3 tbsp lemon juice. Mix these two ingredients together with a spoon until runny and fully mixed. Once the cake is rested and cool, drizzle the glaze on top. Feel free to decorate the cake with lemon slices or lemon zest! 

Tips and Tricks 

  1. Make sure the oven is preheated as this will allow the cake to cook evenly. 
  2. The milk, eggs and butter should be at room temperature. You can take them out of the fridge 30 minutes before starting with the recipe.
  3. While beating the eggs one at a time, scrape the bottom of the bowl thoroughly to ensure the eggs have incorporated well. 
  4. Fold in the flour and milk into mixture. DO NOT OVER MIX. This will deflate the batter. 
  5. Add ½ cup sliced almond or 1 tbsp raisins to give the cake a twist. 

This Lemon Cake Recipe ensures you a lot of tanginess and a bit of sweetness! But if your craving truck loads of sweetness, try the Best Fluffy Pancakes!

Lemon Drizzle Cake

Recipe by Ishana PassiCourse: Baking, DessertsDifficulty: Easy
Servings

8

servings
Prep time

20

minutes
Cooking time

40

minutes
Total time

1

hour 

This lemon cake recipe makes for a soft, springy and moist cake without it being heavy or dry. Neither is it too buttery, oily or sweet.

Ingredients

  • 3/4 cup flour

  • 3/4 cup castor sugar

  • 4 tbsp milk

  • 1/2 cup butter, softened

  • 2 large eggs

  • 2 tsp baking powder

  • zest of 1 lemon

Directions

  • Preheat the oven at 180c. Grease and line a loaf tin with parchment paper.
  • Cream the butter and sugar until fluffy. Add the eggs one at a time along with the lemon zest and beat well.
  • Sift in the flour and baking powder in 2 batches. Add the milk and gently fold using a spatula.
  • Pour the batter into the tin and bake for 35-40 minutes or until the skewer comes out clean.

Recipe Video

Posted on

Best Fluffy Pancakes

Fluffy-Pancakes-recipe-spoonful-stories

Life is all about yummy, fluffy pancakes! These super fluffy pancakes are sure to steal the show at your next brunch! 

This recipe is simple and quick and doesn’t require any buttermilk! 

Pancakes are my favourite treat on a Sunday morning. With cherries on top and a drizzle of maple syrup! 

All that this recipe requires is simple ingredients that you will surely have on hand (flour, milk, eggs, sugar, butter and baking powder). And you will be ready with tall, delicious and fluffy pancakes! 

Tips for Fluffy Pancakes

  • Heat – Cook on medium heat always. It takes longer but the results are better. If you cook on high heat, the pancakes will be brown from the outside but won’t cook on the inside. A non stick pan works the best.
  • Butter the pan – Butter the pan and allow it to heat up on medium heat. This allows the pan to heat up uniformly. Before cooking the pancakes wipe of the excess blobs of butter with a tissue paper. 
  • Batter – The batter should be slightly firm and not runny. It should have air bubbles which would make the pancakes real fluffy! If the batter is too thick add a tablespoon of milk. Or if it is too runny, that means you have added too much liquid, add a little flour to get the right consistency. 
  • Flip – Once the bubbles begin to form and near the edges begin to pop, flip the pancake using a spatula.

Why are my pancakes not fluffy? 

  • Over mixing the pancake batter leads to not so fluffy pancakes. This overworks the gluten in the flour and destroys the air that you incorporated into the batter while whisking. To avoid this, use a gentle hand mixer or a spatula to fold in the dry ingredients into the wet ingredients just until it’s all incorporated. 
  • Stale baking powder is also the culprit for deflated pancakes. Baking powder normally has a shelf life of about 9 months. It is important to check if you’re baking powder is okay to use. Mix half a teaspoon of baking powder in a glass of water. If it will immediately fizzle up, it’s perfect to use!
  • The rough flip! Flipping your pancakes roughly and high into the air results in all the air being squished out of them. Gently flip them with your spatula for fluffy pancakes.

Is it important to let the batter rest?

You should always let the pancake batter rest! This step is a game changer and a secret to flavourful and fluffy pancakes. Before spooning the batter onto the skillet, allow the batter to rest for 5 minutes, this  hydrates the batter and relaxes any gluten that may develop. 

Storage Instructions 

Pancakes can be refrigerated for 2-3 days in an airtight container. Make sure to store them without the maple syrup on top. This would make them soggy. But they taste best when served straight out of the pan with a drizzle of maple syrup, freshly cut berries and whipped cream!

Remember, cooking pancakes is a fun and pleasurable process. Do it with your loved ones and enjoy a lazy Sunday brunch. This fluffy pancake recipe is easy and doesn’t require any fancy ingredients or equipment. Simply follow my recipe and your in for a treat and a fun filled time in the kitchen with your loved ones! 

If you have a sweet tooth make sure to try the Chocolate Mousse!

Best Fluffy Pancakes

Recipe by Ishana PassiCourse: DessertsDifficulty: Easy
Servings

4

servings
Prep time

10

minutes
Cooking time

5

minutes
Total time

15

minutes

Life is all about yummy, fluffy pancakes! These super fluffy pancakes are sure to steal the show at your next brunch! 

Ingredients

  • 2 large eggs, seperated

  • 1 1/2 tbsp full fat milk

  • 1/4 cup flour

  • 1 tsp vanilla essence

  • 1/2 tsp baking powder

  • 2 tbsp sugar

  • 1/2 tbsp butter (for greasing the pan)

  • 2 tbsp water

Directions

  • Put the bowl of egg whites in the freezer for 15 minutes. Mean while, add milk and vanilla to the egg yolks and whisk until frothy.
  • Sift the flour and baking powder into the egg yolk mixture. Whisk until thoroughly combined and set aside.
  • Take out the bowl of egg whites and start beating. When the egg whites turn frothy gradually add the sugar and continue to whip until stiff peaks are formed.
  • Heat a non stick pan over low heat and grease the pan with butter. Keep the heat on while incorporating the egg whites and egg yolks mixture.
  • Gently fold in the mixtures using a spatula. Each pancake gets roughly 3 scoops of the batter. Scoop the batter and place on the frying pan. Make a tall pancake and don’t spread the batter on the pan.
  • Stack one scoop at a time. Give an interval of 10-15 seconds between each scoop keeping it high up and not wide.
  • Add 1 tbsp of water on the empty sides of the pan and cover with a lid. Water keeps the pancakes moist. When the bubbles on the edges start to pop gentle flip the pancake. If the pancake is stuck to the bottom let it firm up a little and then flip.
  • Once nicely browned on both sides, transfer the pancakes to serving plates. Serve with maple syrup, berries and fresh cream!
Posted on

Chocolate Mousse

Fluffy and rich, yet light as a cloud! So chocolatey that it just melts in your mouth! Don’t be fooled by the French name, this Chocolate Mousse is easier to make than you might think!

This is one of the dessert recipes that you can whip up on a busy day! Chocolate mousse is one of the easiest desserts to make! All that is needed is a hand mixer, spatula and easily available ingredients from your pantry! And the chocolate mousse is ready to go! 

This easy mousse recipe is equally delicious and versatile. Eat it on its own or layer it in a trifle or cake!

It’s a no bake, creamy, chocolatey mousse that you will love! 

I have tried many recipes before but never found the perfect one. Some were too complicated and required many ingredients or others never yielded the best results. So, after many hits and trials here I am with the best chocolate mousse recipe! 

When deciding on a recipe I always search for the one which has minimum ingredients and those that are easily available in an Indian market. This recipe is exactly what you would want if you search for the same. It is not only an easy recipe but also tastes amazingly delicious! 

ingredients-chocolate-mousse-recipe-spoonful-stories

I can guarantee this because both my younger brothers finished two cocktail glasses of this chocolate mousse within minutes! 

Because my brothers like vanilla flavour the most, so I have used vanilla essence. But feel free to incorporate any flavour into the egg yolks that you like. Lemon, orange, coffee, caramel, brandy, bourbon, rum, cinnamon, nutmeg or clove are a few ideas that you might like. 

Serving the Mousse

The chocolate mousse can be served in martini glasses, champagne flutes, espresso cups, tea cups or fancy small bowls. Or if you’re hosting a dinner party, serve the chocolate mousse in shot glasses to give the guests a small taste.

This dessert recipe requires the mousse to set in the refrigerator for at least 2-3 hours or overnight. Before refrigerating the mousse cover the glasses with plastic wrap. 

How-to-make-chocolate-mousse-glasses-spoonful-stories

Tips for the Best Chocolate Mousse

chocolate-mousse-recipe

Quality of the chocolate – The recipe has a very few ingredients, the better the quality of the chocolate – the best flavour will shine through. It is important to choose the right chocolate for the mousse. The higher the percentage of cacao chocolate, the more bitter it will be. I personally like the mousse with a dark chocolate flavour so I have used dark chocolate.

Melting the chocolate – There are two ways of melting the chocolate. The traditional method is melting over simmering water. Place the roughly chopped chocolate in a large bowl which fits perfectly over a pot of simmering water. Make sure the water doesn’t touch the bowl of chocolate. In a few minutes, the chocolate will melt without much stirring required. Remove from heat and set aside when most of the chocolate is melted. Stir a few times.

The second method required a microwave. This is a quicker method of melting chocolate but make sure to keep an eye on it. Place the roughly chopped chocolate in a bowl and microwave for 12 seconds. Take it out and give it a quick stir and microwave for 10 seconds. This process might have to be repeated a few times until the chocolate is fully melted.

You cannot melt the chocolate straight for 30 seconds as this would melt the chocolate unevenly and might burn it too.

Whipping – Make sure to whip the egg whited until foamy until stiff peaks are formed. Don’t over whip as this would split the egg whites.

Whipped- Egg-whites-spoonful-stories

Ribbon Stage – The egg yolks and the melted chocolate need to be whipped until they reach what is called a ribbon stage. The ribbon stage is when the mixture of the egg yolks and chocolate will thicken and drop from the whisk in thick ribbon like drizzles. 

Folding – This stage is the most important for the texture of the chocolate mousse. Folding requires you to gently stir when incorporating a light mixture, such as egg whites, into a heavy mixture like the melted chocolate. If you don’t fold gently then all the air that you whipped into the egg whites will deflate at the end. It is easier to fold smaller amounts of the lighter mixture into the heavier mixture. 

I hope you try this chocolate mousse recipe, please do leave your comments and suggestions below and let me know how you liked it!

If you are a chocolate lover, make sure to try my Best Homemade Fudgy Brownies! They are a game changer!

Chocolate Mousse

Recipe by Ishana PassiCourse: DessertsDifficulty: Easy
Servings

6

servings
Prep time

20

minutes
Cooking time

3

hours 
Total time

3

hours 

20

minutes

Fluffy and rich, yet light as a cloud! So chocolatey that it just melts in your mouth!

Ingredients

  • 150 gm Dark chocolate

  • 3 eggs, seperated

  • 50 gm Butter

  • 50 gm Castor Sugar

  • 1 tsp Any flavour

Directions

  • Melt the chocolate over a double boiler. Add the butter and incorporate well.
  • Whip the egg whites until foamy and gradually add the sugar. Keep whisking until stiff peaks are formed.
  • Beat the yolks and add the chosen flavour (1 tsp vanilla essence).
  • Once the chocolate mixture is cool, incorporate the yolk mixture into it.
  • Fold in a spoonful of the egg whites mixture into the chocolate mixture. Pour the remaining whites and fold gently until fully combined.
  • Pour the mousse into glasses and cover with plastic wrap. Refrigerate for 2-3 hours or overnight. Decorate with chocolate shavings before serving.

Recipe Video

Posted on

Best Homemade Fudgy Chocolate Brownies

Best-Homemade-Fudgy-brownies-recipe-Spoonful-stories

The Best Homemade Fudgy Chocolate Brownies Recipe! Crackly on the top, crispy on the edges and gooey in the middle. These fudgy chocolate brownies will leave you craving for more! 

When you need a sweet chocolate fix, these homemade fudgy chocolate brownies are the perfect choice. These brownies will be over in no time leaving you licking your fingers! For many years, I have been trying various recipes to get the perfect batch of fudgy brownies. I always wanted the brownies to taste exactly the same way they taste in cute dessert cafes. Chocolate oozing out from the centra, burnt crispy sides and a flaky top. But no recipe met my standards. 

So during the lockdown, I tried experimenting with my chocolate cake recipe to get the perfect batch of fudgy gooey chocolate brownies. The end result was divine! Ever since then I’ve had this recipe on repeat. Trust me you’ll be wanting to make these ASAP!  It’s even better than the boxed brownie mixes that are available. 

These homemade, fudgy, gooey brownies are true-PERFECTION! 

What ingredients do you need for Homemade Fudgy Chocolate Brownies?

This recipe calls for the regular pantry ingredients. Flour, sugar, cocoa powder, eggs, butter and not to forget CHOCOLATE! 

Ingredients-for-Homemade-Fudgy-brownies-Recipe

Make sure to use good quality, unsweetened cocoa powder, sifted to avoid any lumps in the batter. If available, try using a Dutch processed cocoa powder as it is darker and fudgier. Use all purpose flour but you can substitute it with all purpose gluten free flour. I have used salted butter because there is no salt in this recipe, but you can also use unsalted butter. Try using rich dark chocolate, as the recipe already has a lot of sugar. It will balance the bitter and sweet. 

What makes brownies fudgy? 

To make fudgy, gooey and chewy chocolate brownies make sure the recipe has a high fat to flour ratio. The fat in this recipe is the butter and chocolate. With this high fat to flour ratio you will get the perfect fudgy brownie with a crackling top. To make cakey brownies, add three times as much flour. But for me a good brownie is gooey and fudgy, rather than cakey. 

How-to-make-fudgy-homemade-brownies

The use of good quality dark chocolate makes all the difference. This is what makes the brownies lethal and extra chocolatey. 

There is no need to add any leavening ingredient in the mixture as this is what makes the brownies gooey and fudgy. The eggs used in this recipe act as the leavening ingredient as they incorporate air into the batter, which causes the cake to rise. Thus, if you want to make cakey brownies then add baking powder to the batter. 

Toppings for the Homemade Fudgy Brownies

Brownies are delicious by themselves. But taste best with a scoop of vanilla ice cream on the side. If you want to go a little extra then you can add various nuts, oreo biscuits, chocolate sauce, salted caramel sauce or Nutella. To make the brownies extra decadent my personal favourite is to add crumbled pieces of oreo biscuits. Directly sprinkle them on to the batter and make sure to smooth the batter on the top. 

Homemade-fudgy-brownies-batter-recipe

Let the brownies cool completely on a before slicing and serving them. Else the brownies will lose their shape and it’ll all be a yummy gooey mess. 

Hope you try these super fudgy, gooey brownies and I’m sure this will turn out to be your best brownie recipe!

Best Homemade Fudgy Brownies

Recipe by Ishana PassiCourse: Cakes, DessertDifficulty: Medium
Servings

16

squares
Prep time

25

minutes
Cooking time

35

minutes
Total time

1

hour 

The Best Homemade Fudgy Chocolate Brownies Recipe! Crackly on the top, crispy on the edges and gooey in the middle.

Ingredients

  • 150 gm salted butter

  • 300 gm dark/semi sweet chocolate

  • 3 large eggs

  • 360 gm sugar

  • 1 tsp vanilla extract

  • 5 tbsp cocoa powder

  • 1 cup all purpose flour / gluten free flour

Directions

  • Preheat the oven at 180 c. Prepare a 8×12 inch baking tray. Grease and then prepare the tray with parchment/butter paper.
  • Set up a double boiler and melt the butter. Take it off the heat and once slightly cooled add the chocolate. Let the chocolate melt. Add the vanilla essence. Gently mix together well.
  • Whisk the eggs and sugar together. Until air bubbles appear.
  • Incorporate the chocolates and butter mixture with the egg mixture.
  • Sift in the cocoa powder and flour. Gently fold the mixture until mixed well.
  • Transfer the brownie batter into the prepared tray. Bake for 30-35 minutes on the middle rack. Try shaking the tray, if the middle is still wobbly bake for a few more minutes, until the mixture is soft and firm.
  • If you test by inserting a toothpick, it will come out with moist crumbs on it.
  • Allow the brownies to cool completely before slicing. Serve with your choice of topping.

Notes

  • If you like the brownies firmer, leave them in the fridge for a while.

Pair these lethal chocolate brownies with a Lemon Herb Grilled Chicken Salad to have the perfect Sunday brunch!